


Live Streaming Guide
Broadcast Liturgies to Your Congregation

A Ministry of Digital Presence
It’s a digital world. Everywhere you look, we’re surrounded by screens. From billboards to checkout counters to living rooms to dashboards to pockets, the virtual world is all around us. Families spend time around the television watching their favorites movies, friends keep in touch by sending each other pictures and snaps, distant relatives stay connected through social media, and much of our news comes to us through similar means. No matter where we are, we’re only a screen away from what’s happening at any given moment.
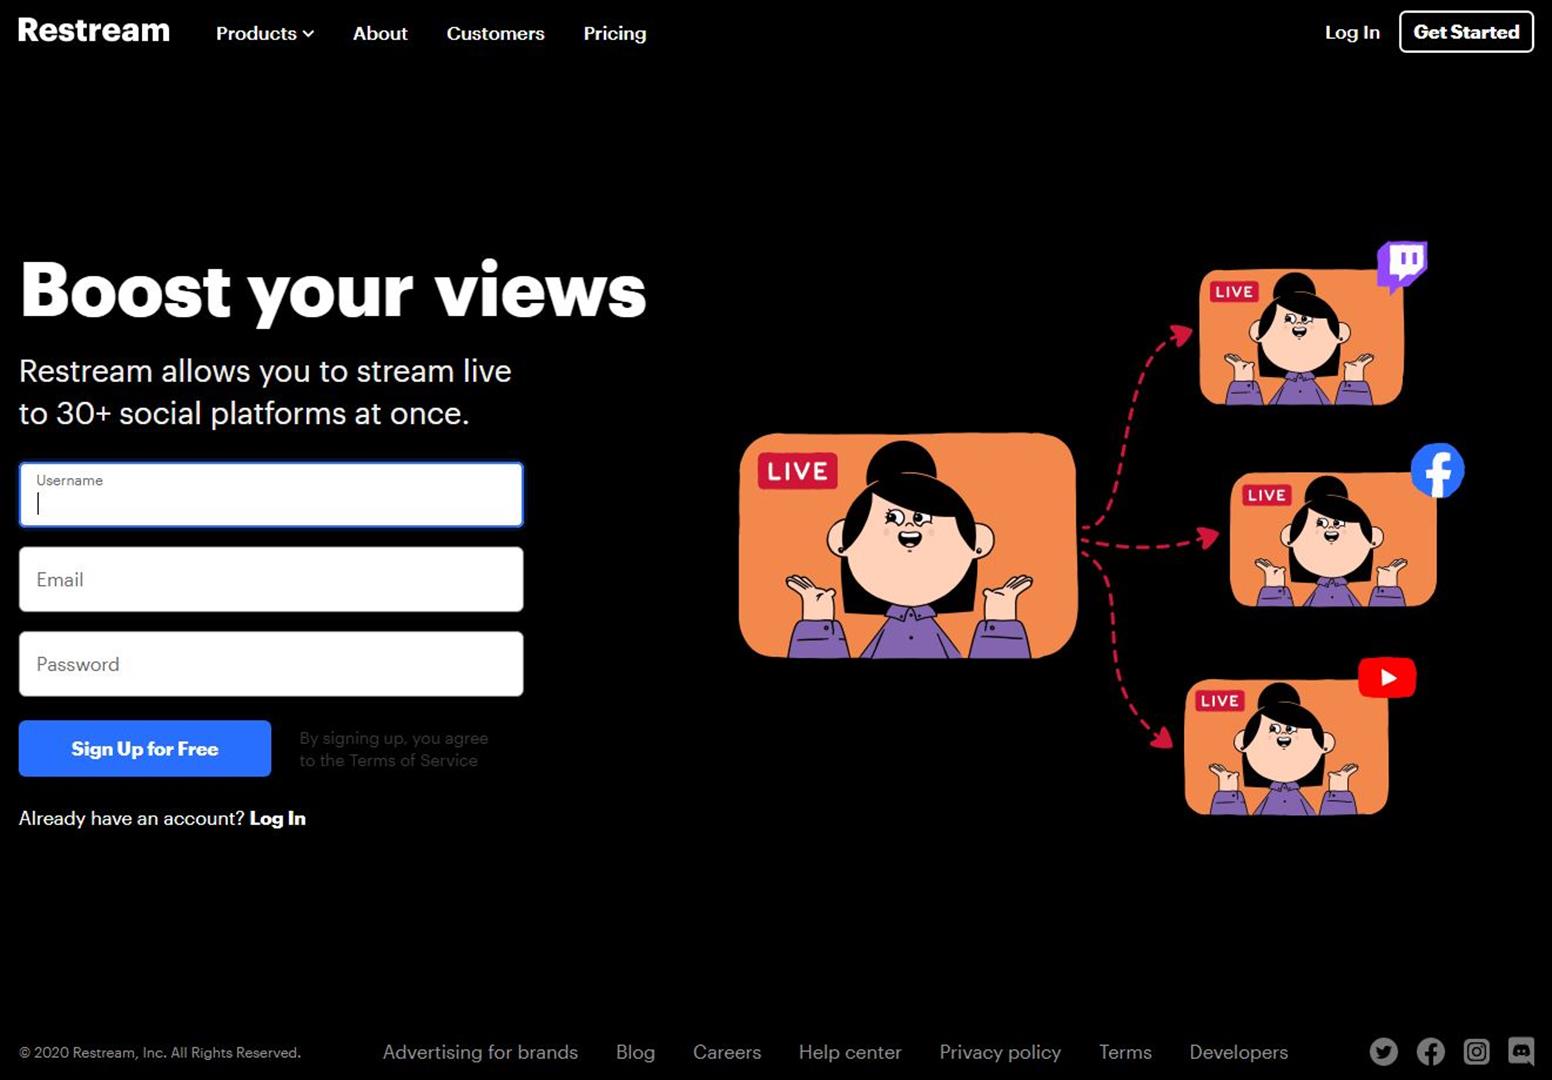
But, what if we were only a screen away from what’s happening at our local parish, too? What if the pastor could give a special message in real time and reach a broad range of parishioners? What if the parish wanted to stream the Holy Sacrifice of the Mass for the homebound? This can all be done using a simple platform called Restream.io. Restream.io is a streaming service that acts as a hub for all your streaming video content. The best part is once it is configured, a single stream can be sent to multiple platforms including Facebook Live, YouTube, Twitch, and many more.
If you have a tablet, smartphone, or mobile device with a camera and microphone, chances are you can stream video from that device. All that’s needed is an app called StreamLabs and a few accounts on popular streaming platforms. The following is a step-by-step guide to showing how to capture video with a mobile device and stream it to YouTube and Twitch with Restream.io.
Table of Contents
Please use these links to quickly jump to each section. Use the browser’s back button to return to this menu.
Step 1 - Create Accounts
Restream
This is the service we will use to connect our stream to Facebook Live, YouTube, and other platforms.
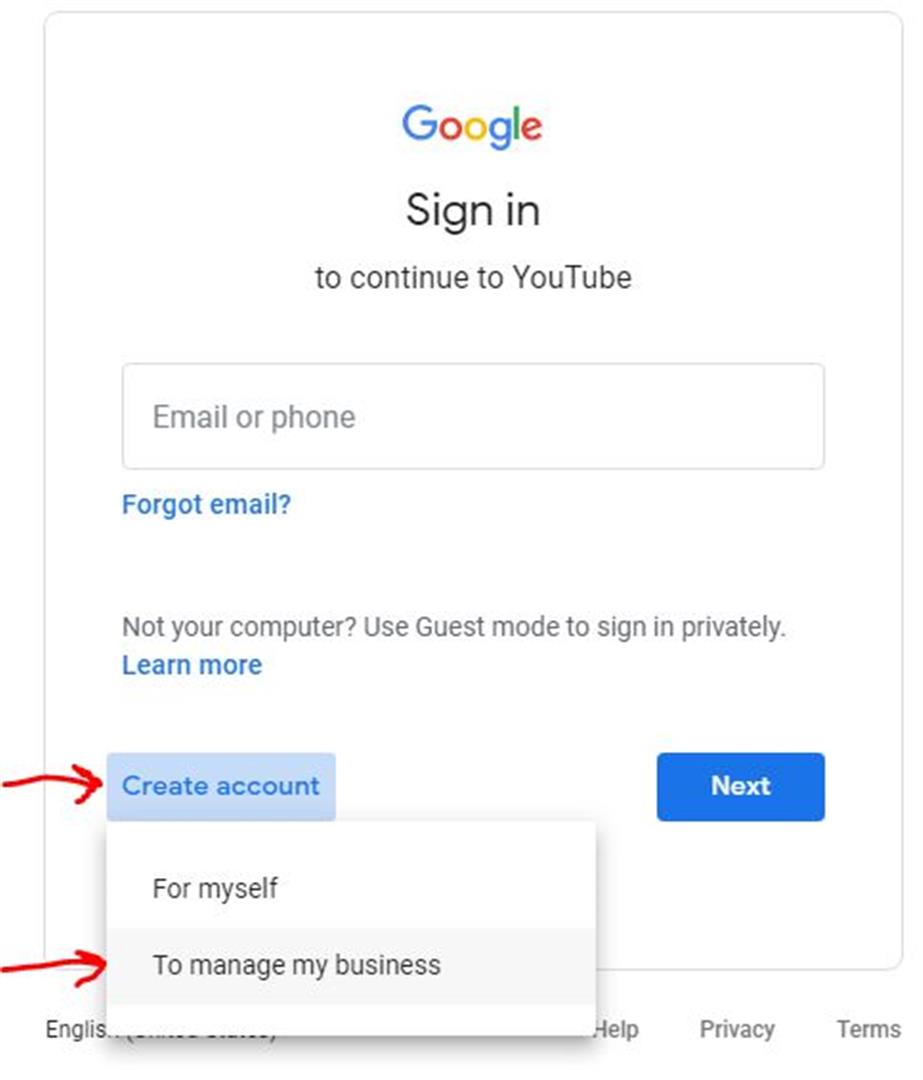
YouTube
YouTube is one of the most popular video sharing platforms in the world. Most mobile devices come with YouTube pre-installed.
Since this is a Google service, you will need to create a Google account. I would suggest creating a business account so others can be added as account managers.
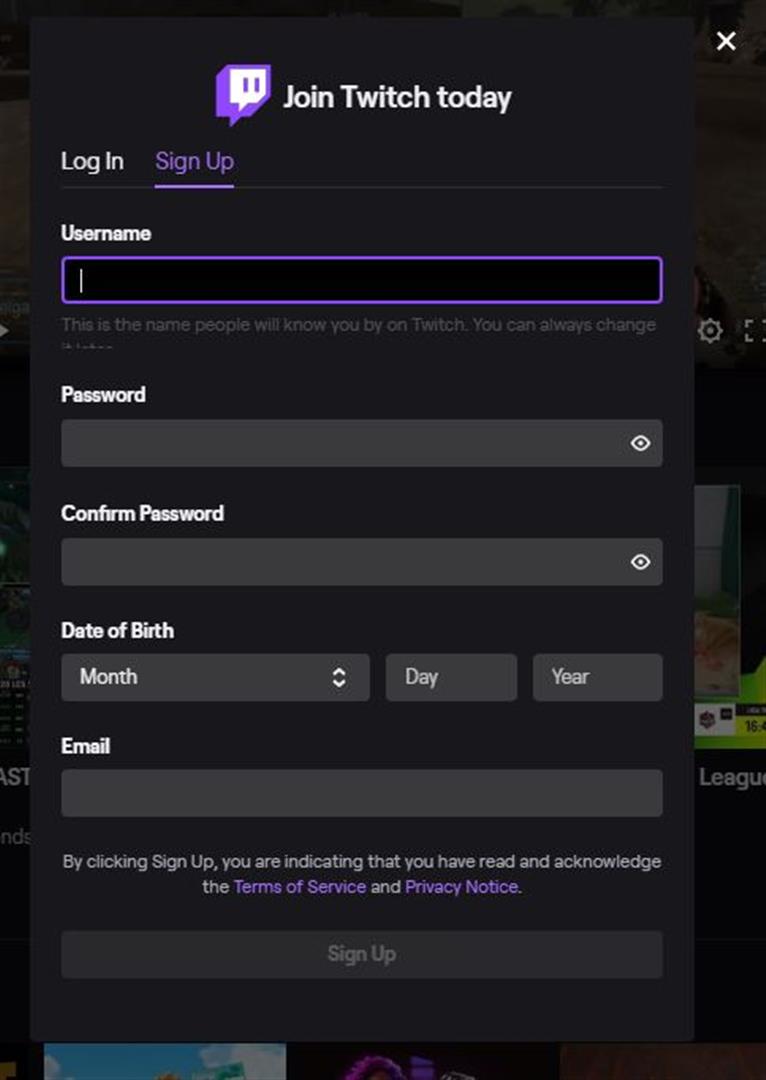
Twitch
This is one of the most popular streaming platforms. People from all over the world use Twitch to share their video game streams and other content. Twitch was designed for live streaming, so it is one of the best platforms for it.
Step 2 - Configure Accounts
YouTube Initial Configuration
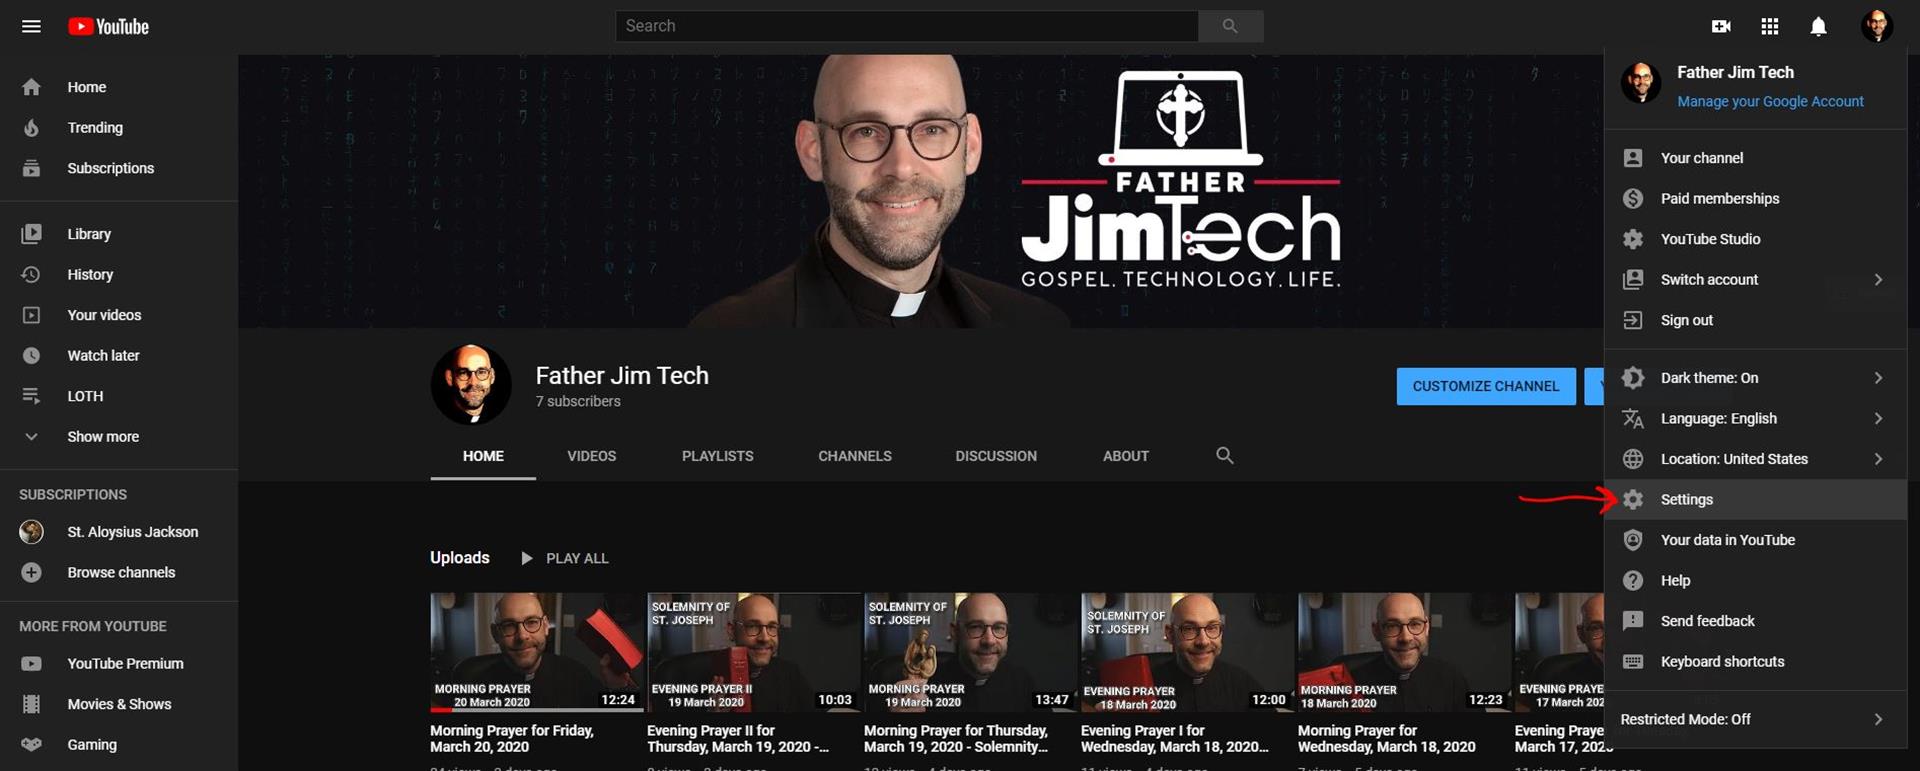
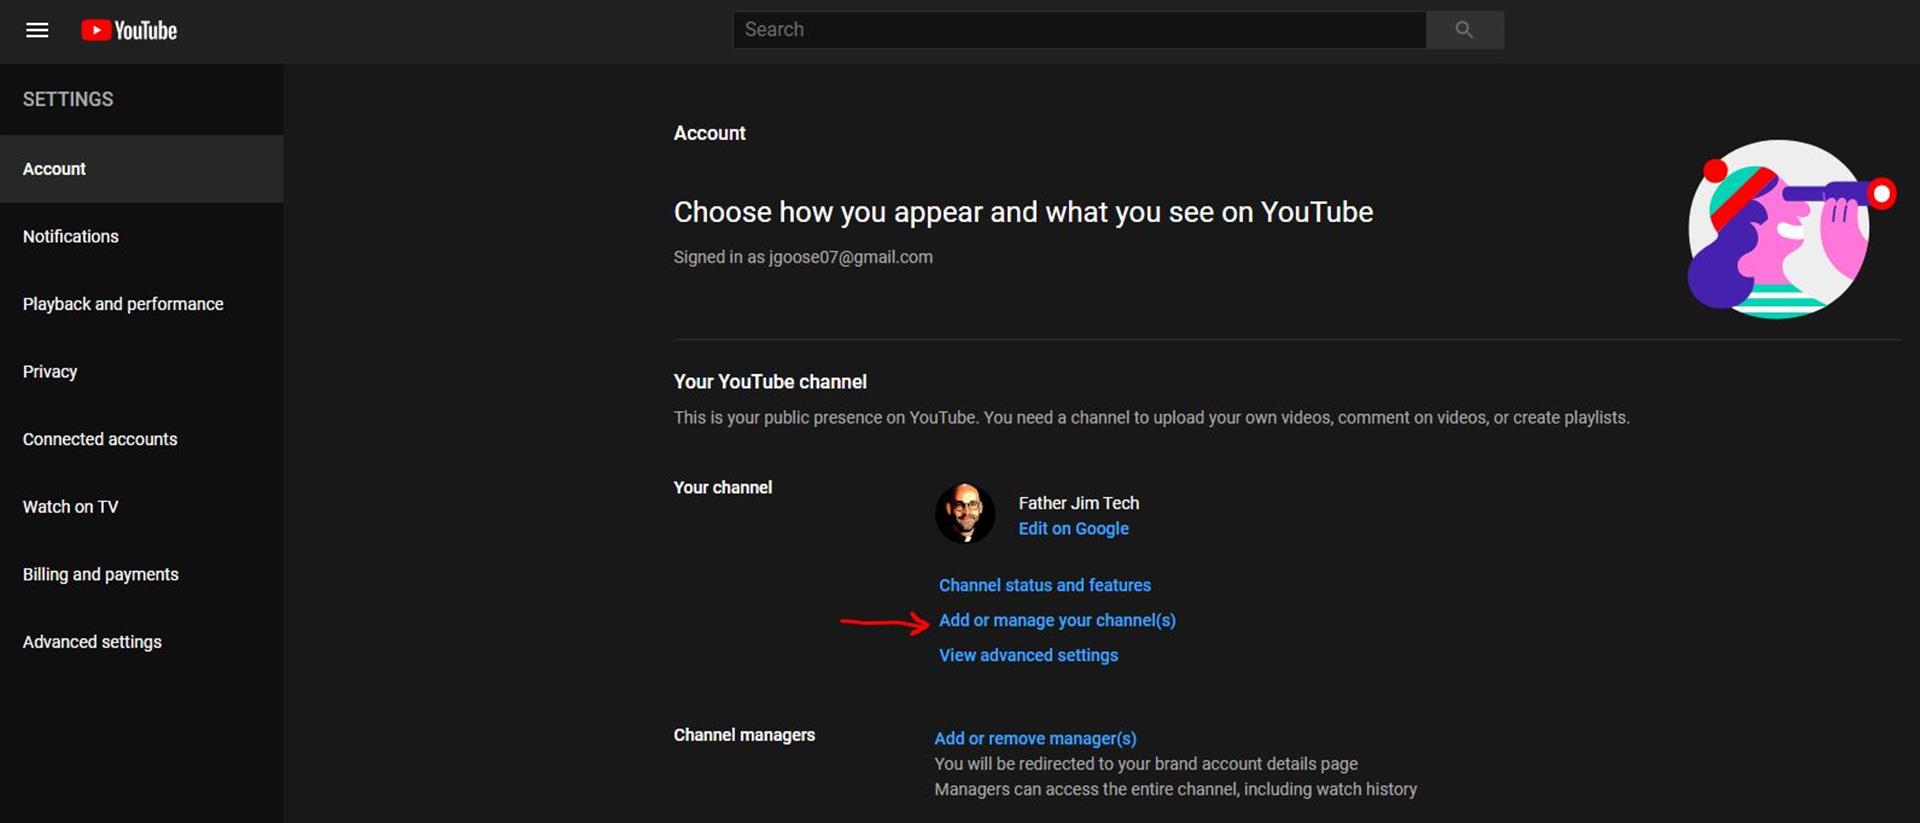
After we create our Google account, we will need to login to YouTube and create a new channel. Click the icon on the top right of the screen and then click Settings.
Click the link in the center of the page to Add or manage your channels.
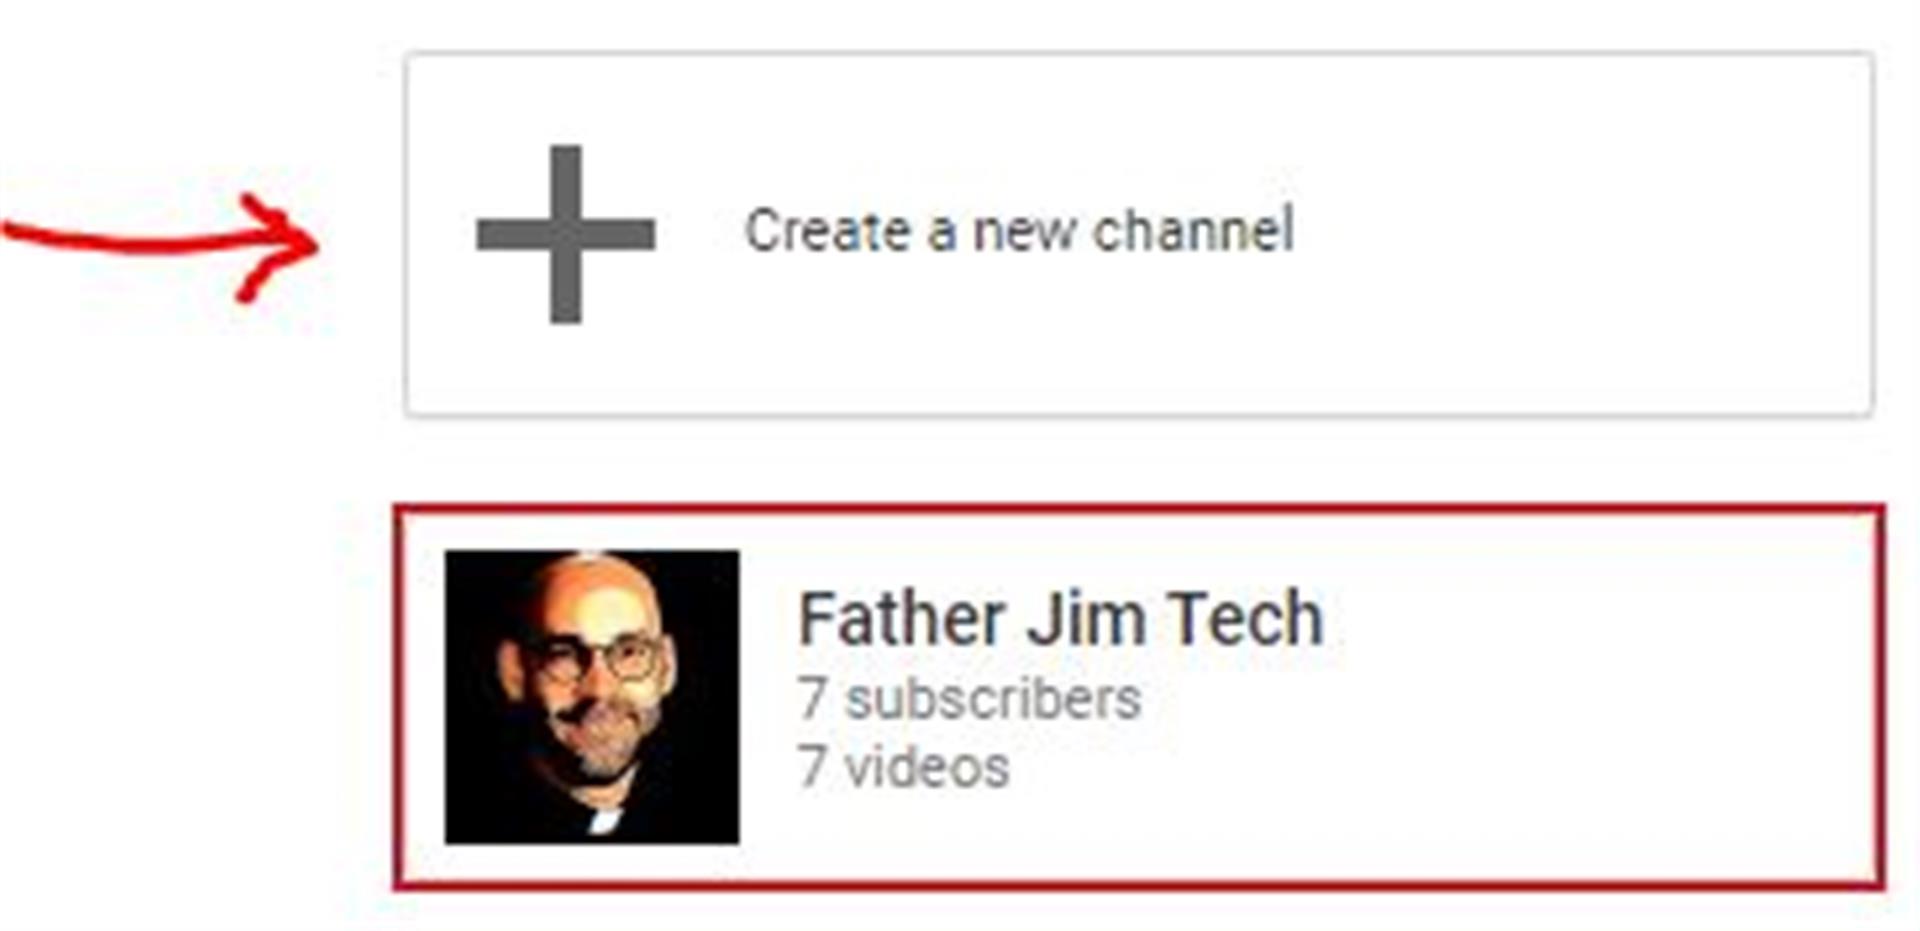
Click Create a new channel and give the channel a name.
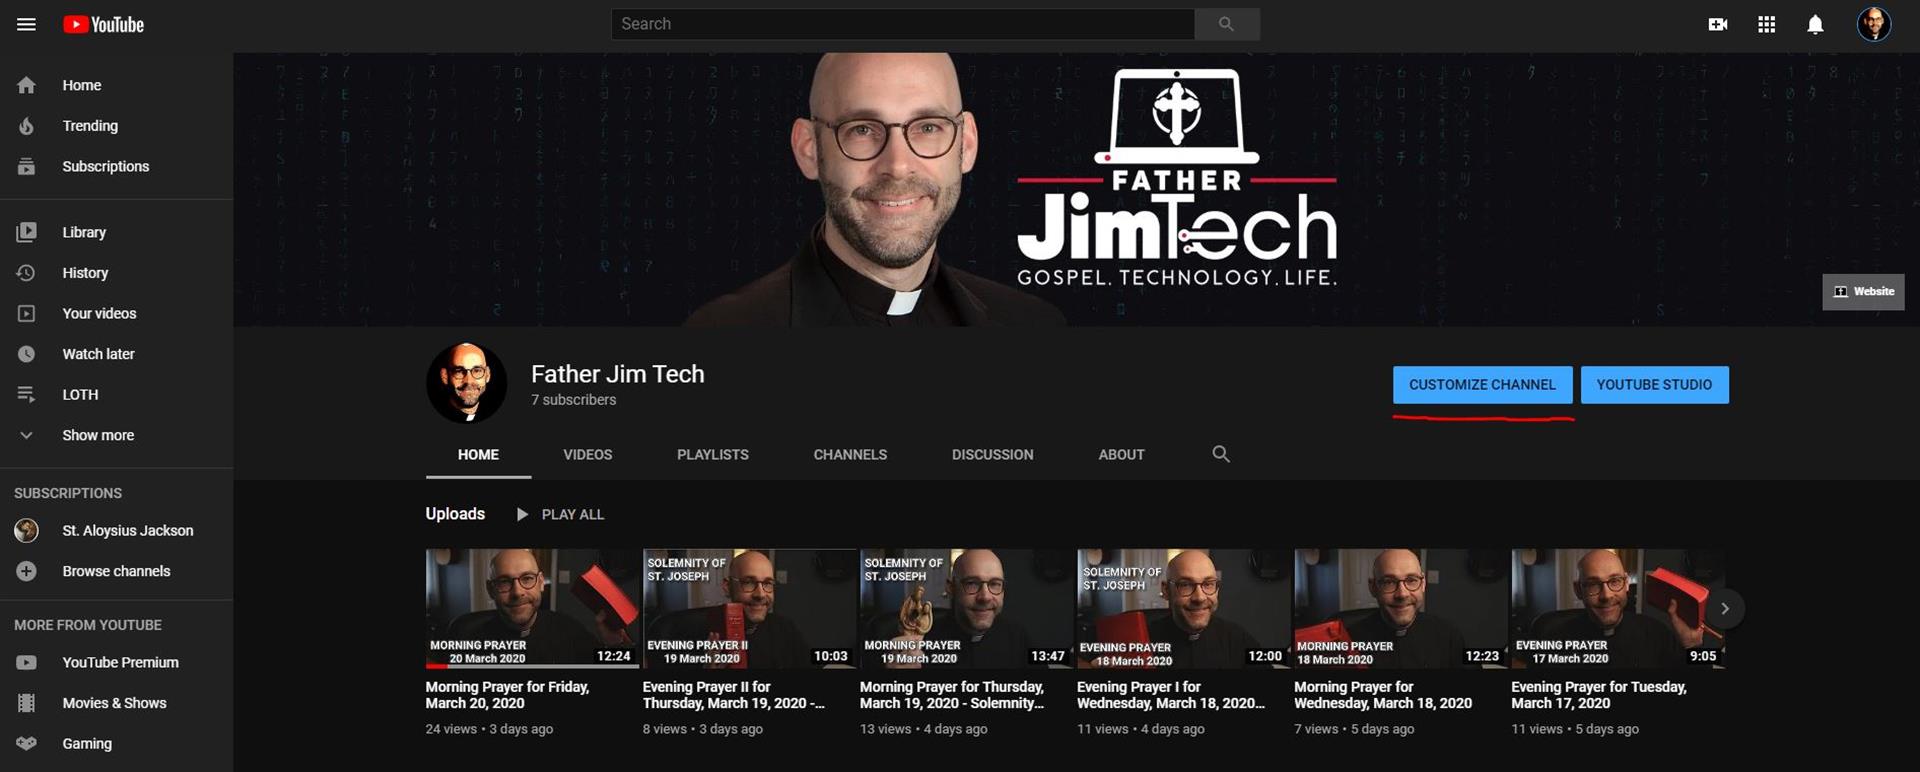
Once our channel has been created, use the dropdown menu and click on Your channel, then click the customize channel button.
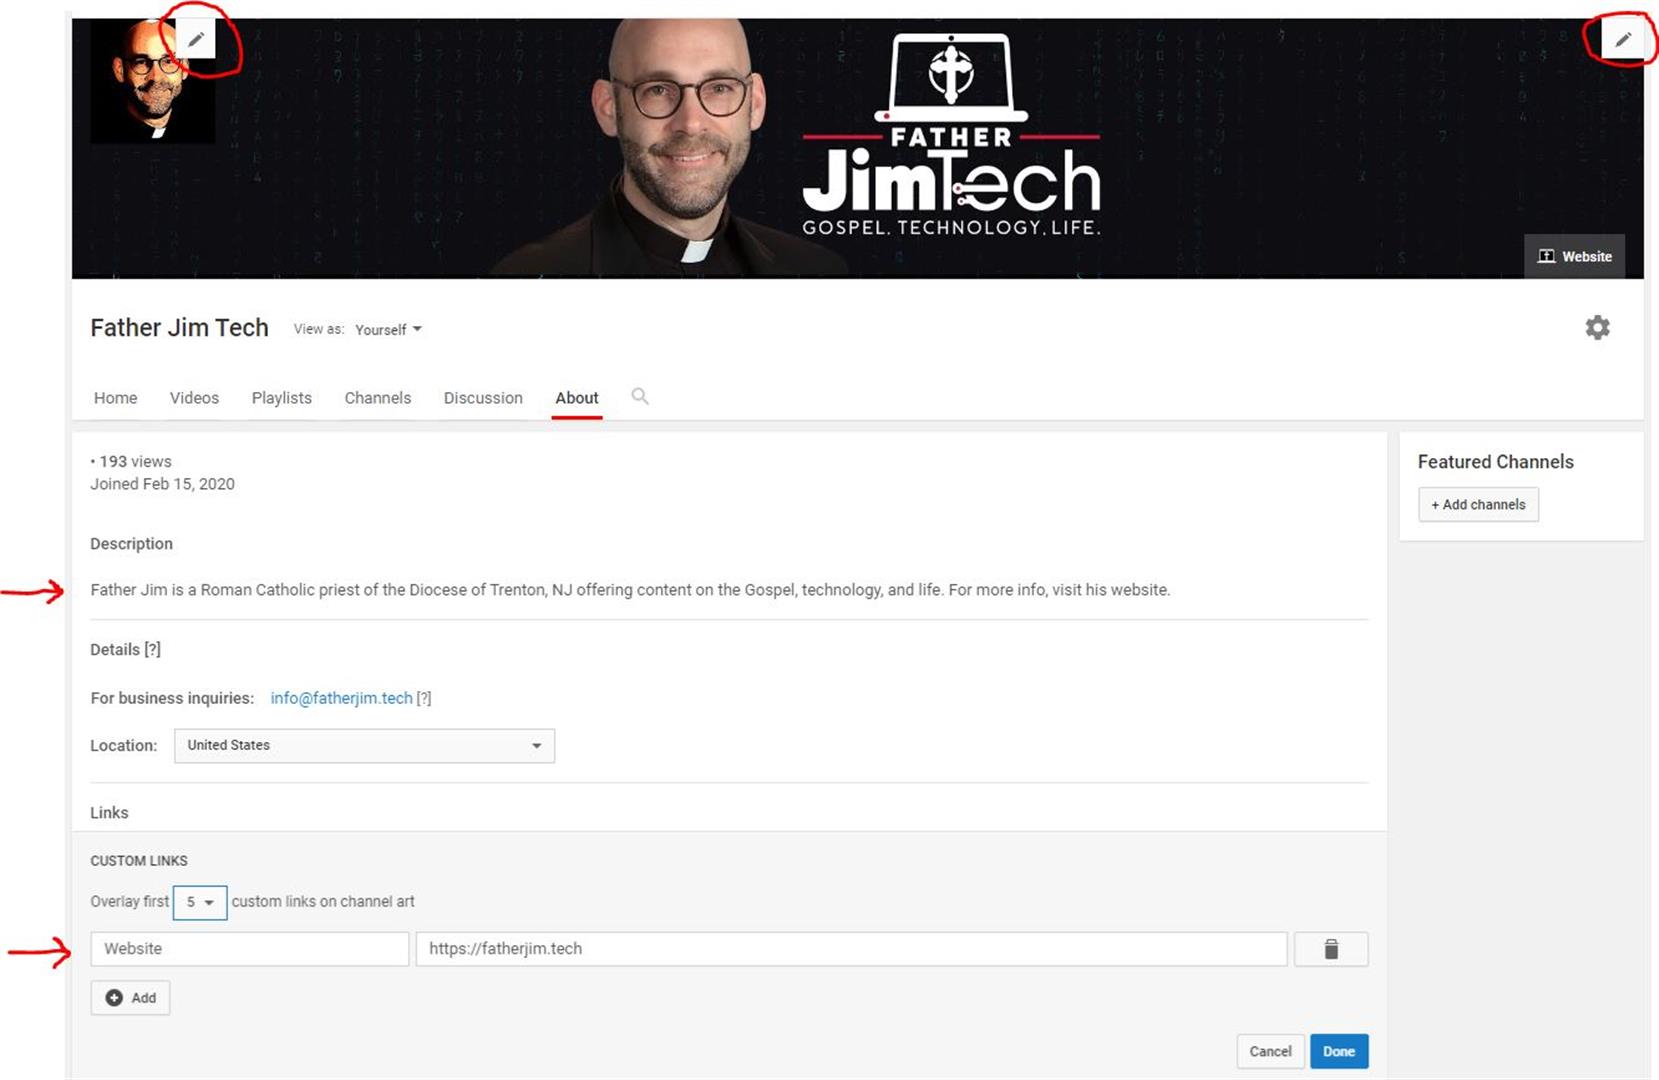
There is a lot we can do here to enhance the look of the channel. Start by adding channel graphics such as the icon and banner. Then click on the About tab and add a description for our organization, e-mail, and website address.
Twitch Initial Configuration
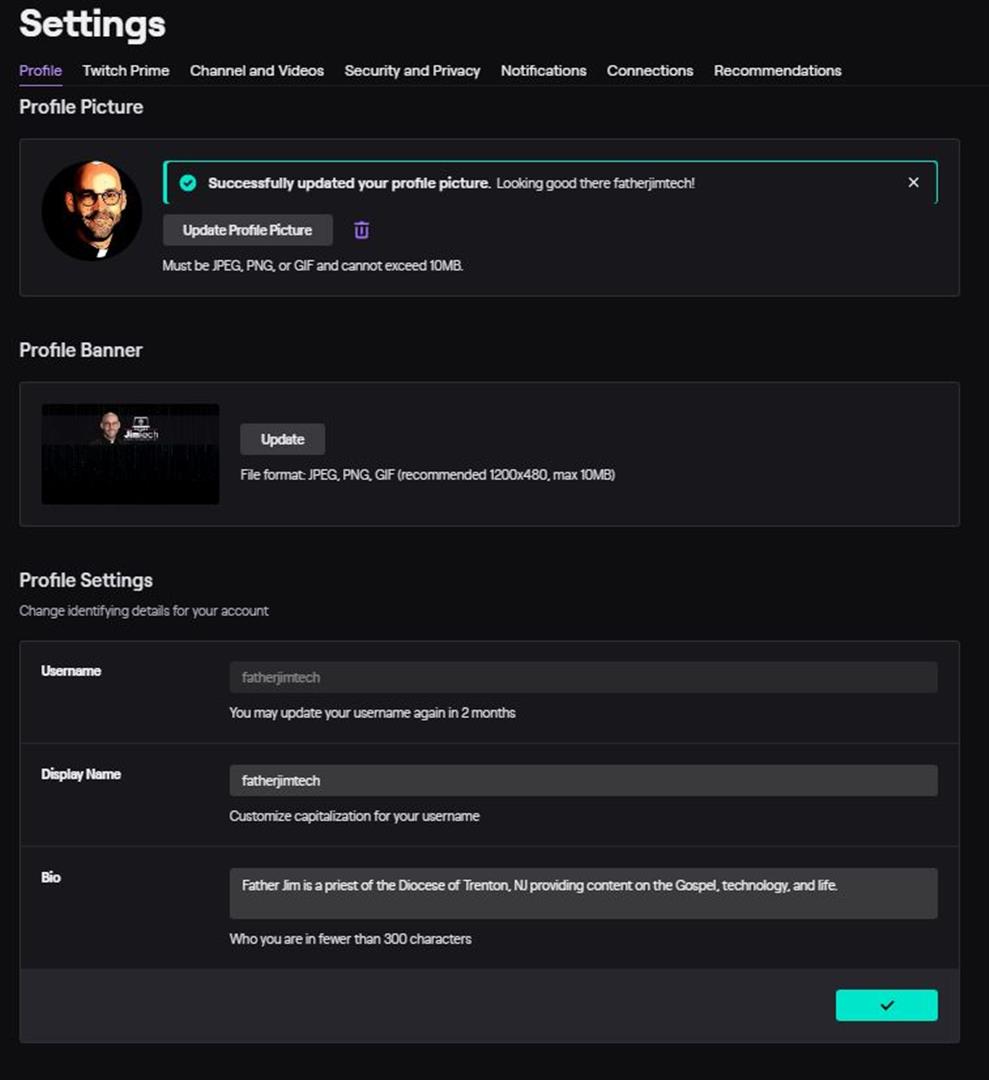
After creating our Twitch account, click the icon on the top right of the screen and then click Settings.
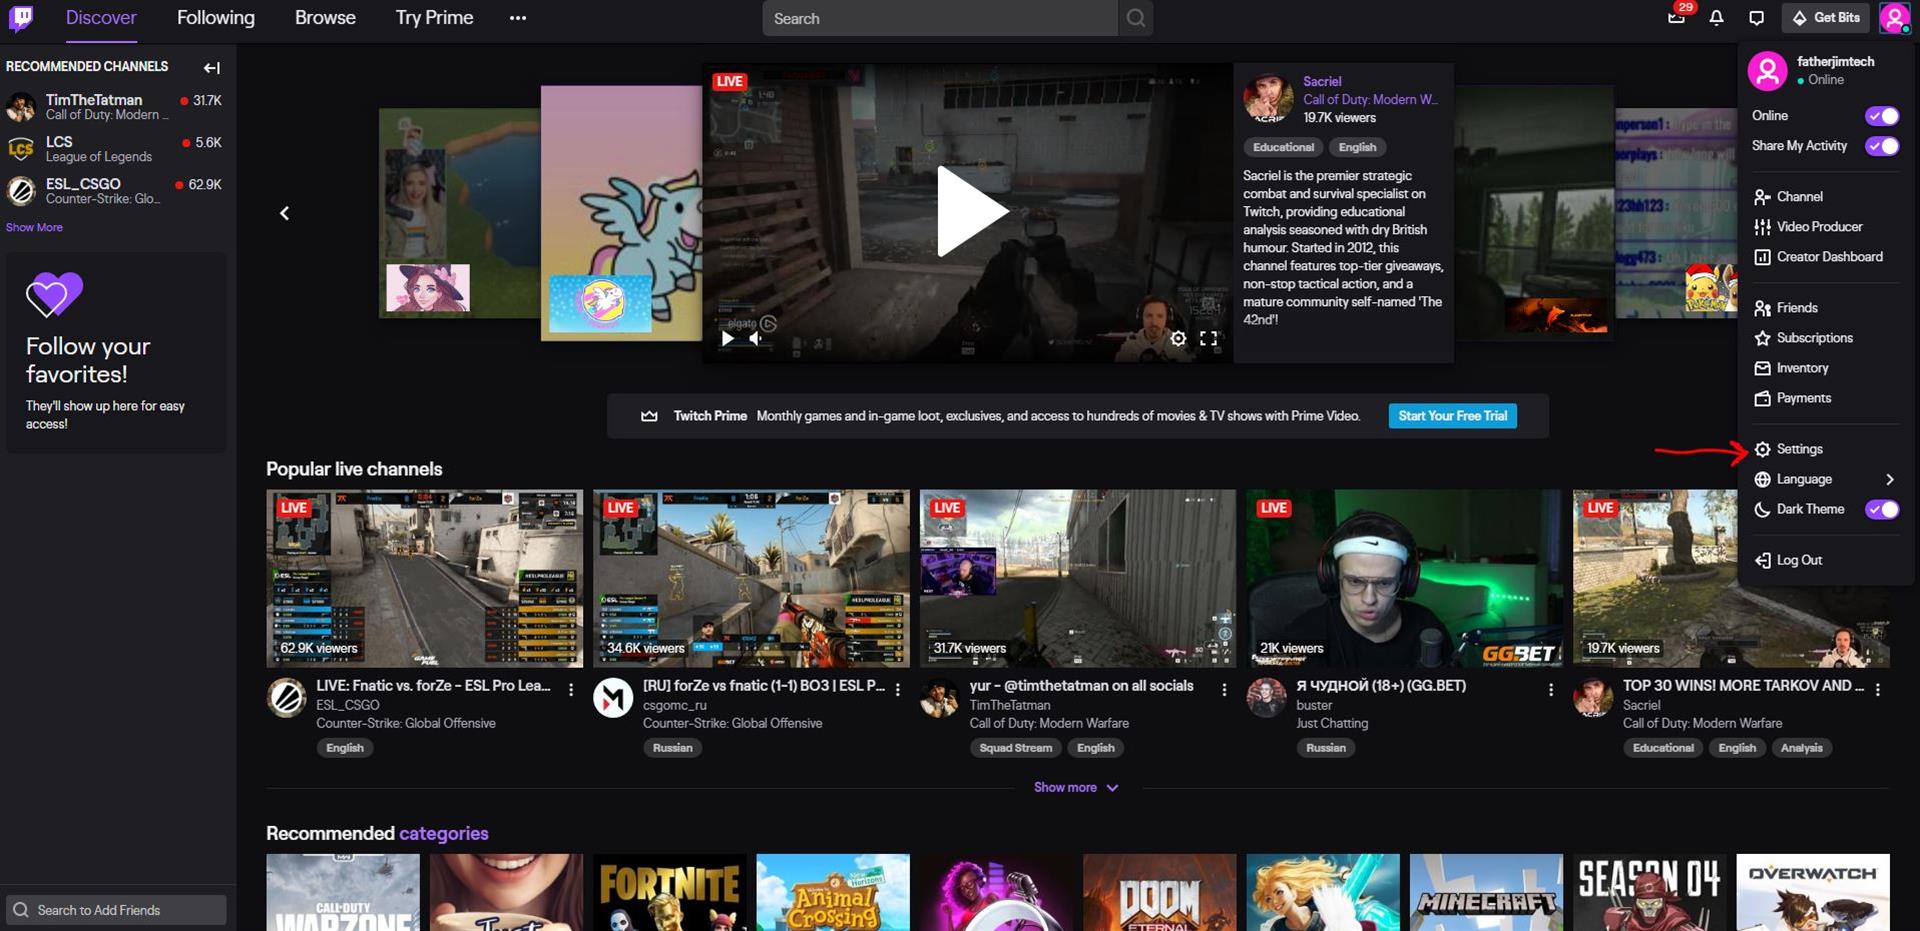
On the Profile tab, we can upload channel graphics such as our profile picture and banner (in some cases we can use the same banner art that we uploaded to YouTube). Next, add a bio for the organization and click the check mark to save.
Next, click the Channel and Videos tab and set the option to record past broadcasts. Turning this on will cause an archived copy of our stream to be stored on Twitch so others can view it again.

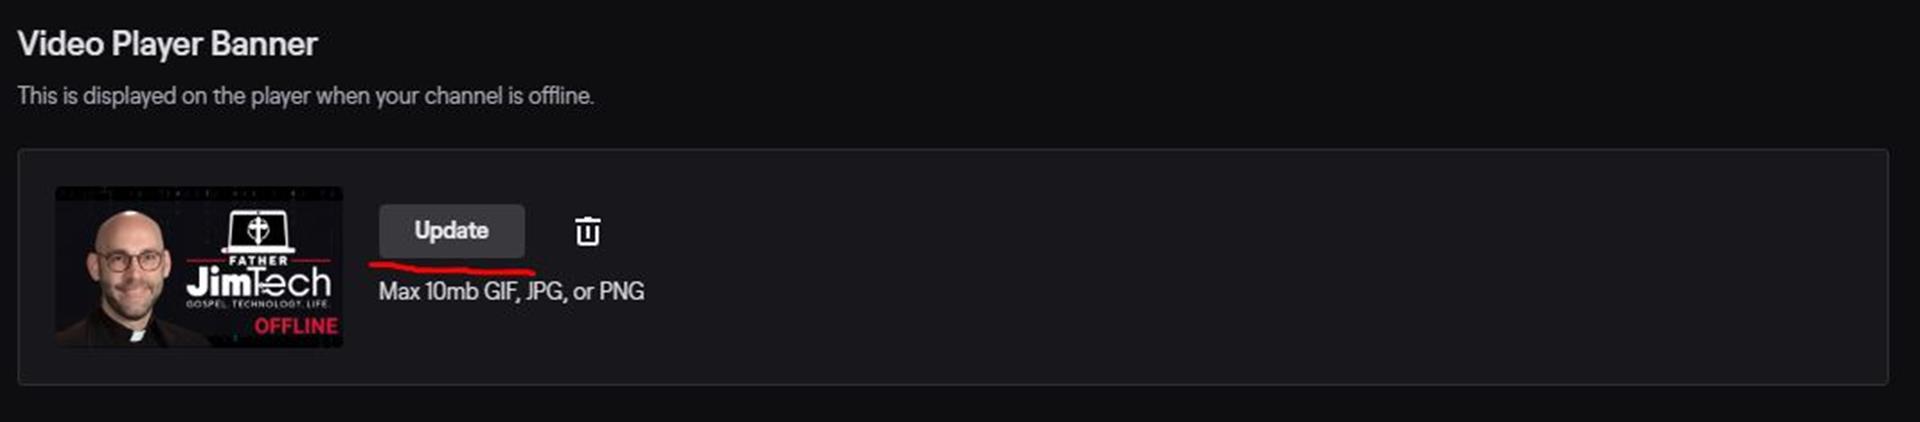
Also, within the same section, scroll down to Video Player Banner. This is an image that will appear on our channel whenever we are not streaming. A 1920x1080 pixel image is recommended so that it fits the aspect ratio of most HD mobile devices.
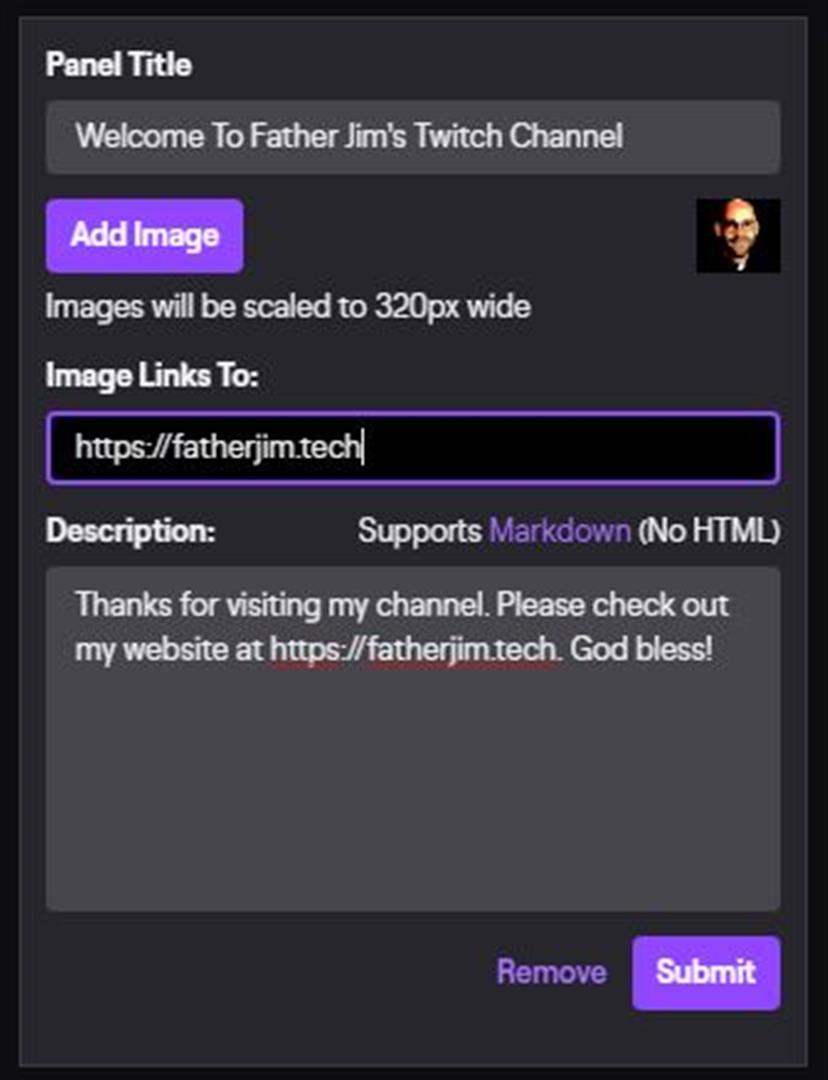
Lastly, we’ll add some basic info to the bottom of our channel. Navigate to twitch.tv/YOURCHANNELNAME (where YOURCHANNELNAME is the name you chose for your channel). Under the video window, click the Edit Panels switch. Then, click the + and Add a Text or Image Panel.

Upload a logo or icon, provide a link to the website, and a brief description.
Restream Initial Configuration
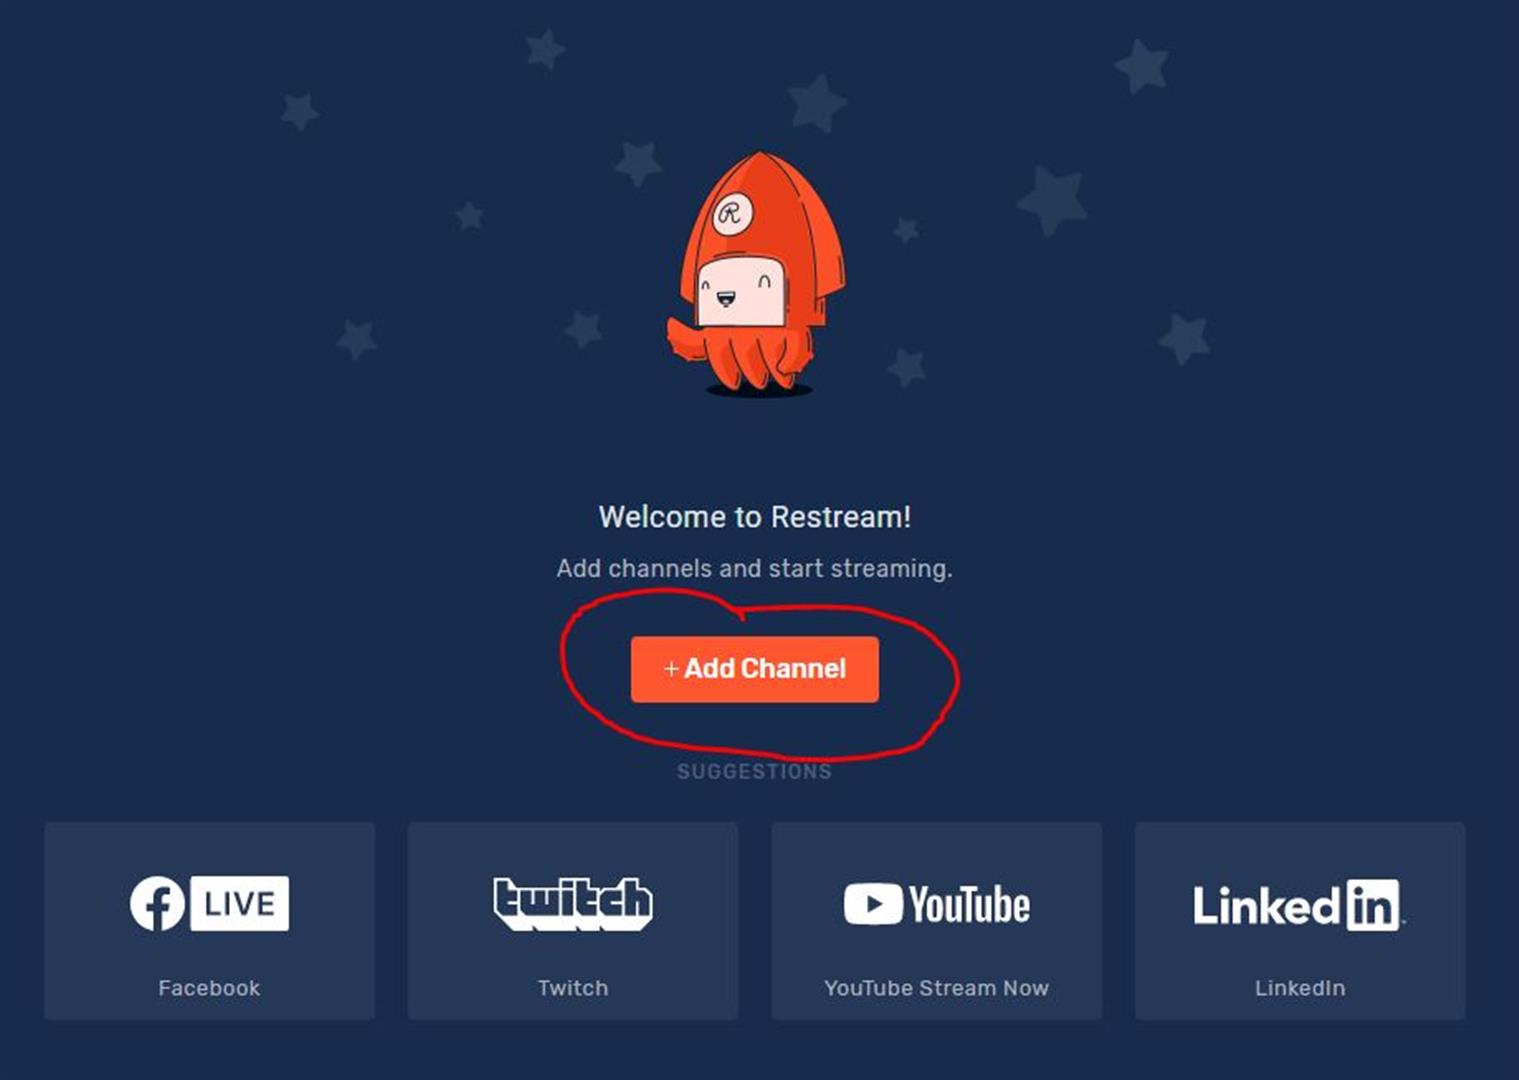
Now that our YouTube and Twich accounts have been configured, it’s time to connect them to Restream.io. On the Restream welcome page, click the Add Channel button.
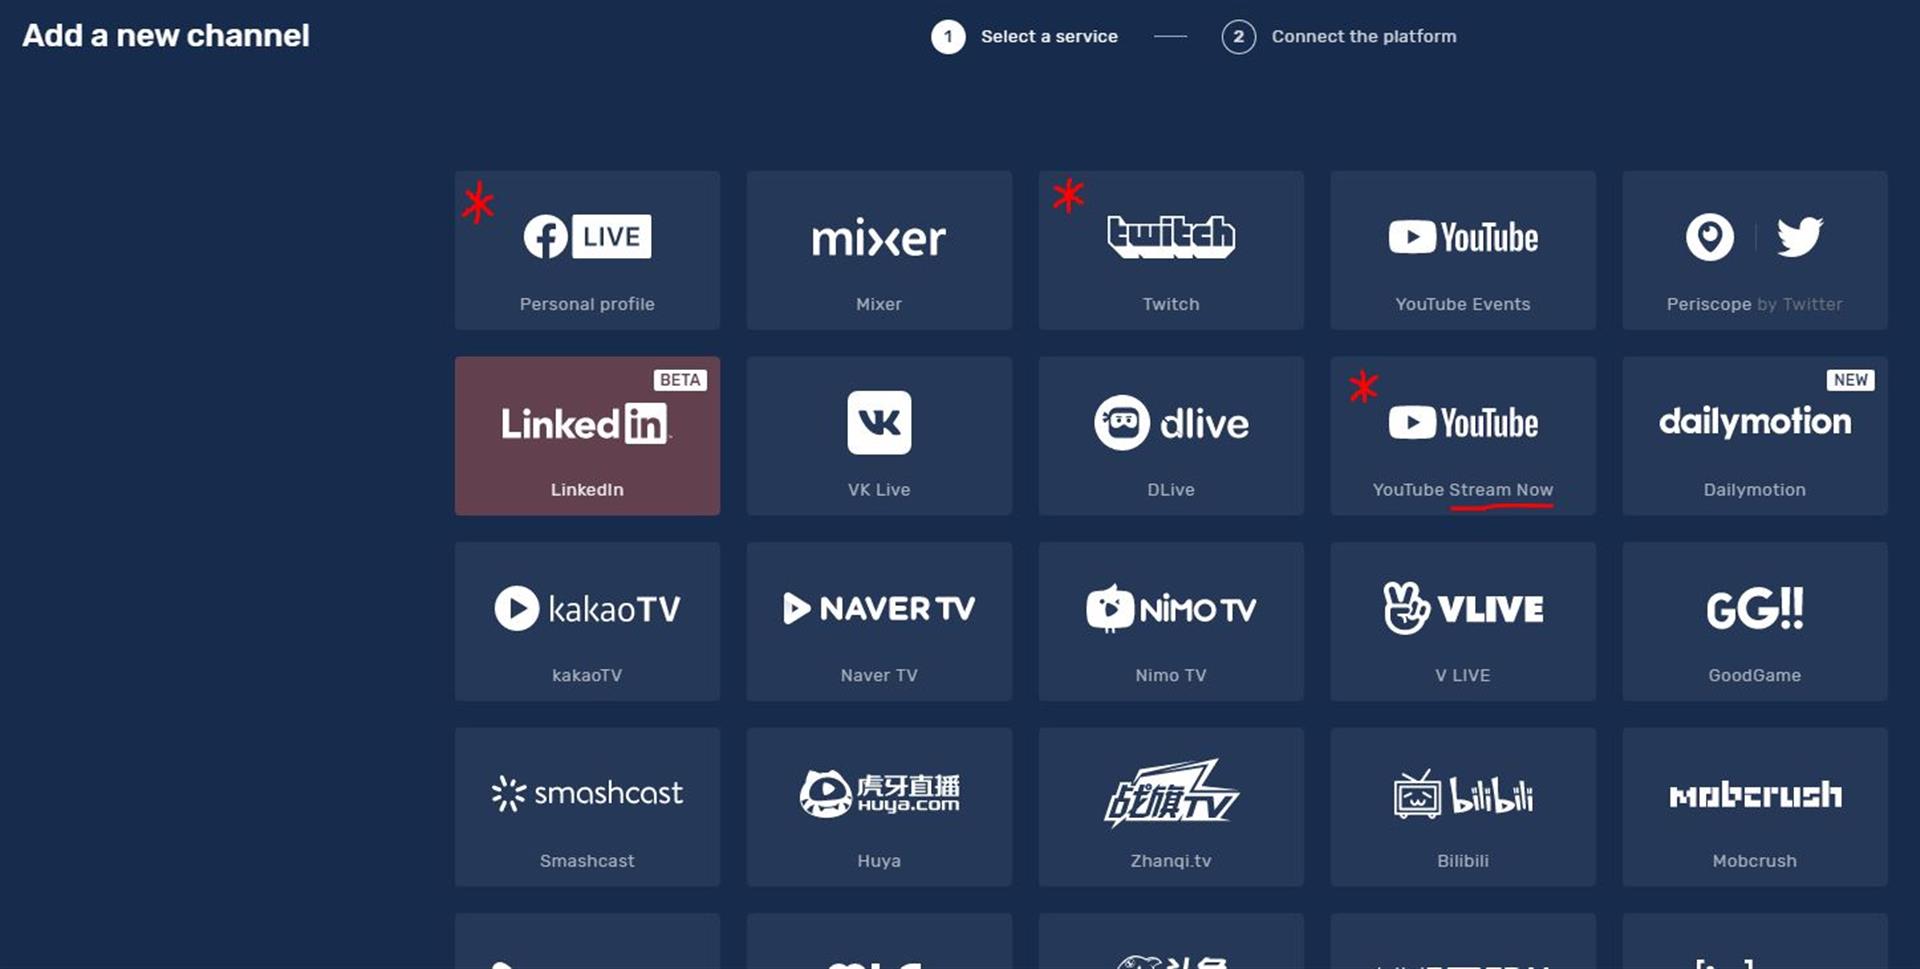
This menu is used to connect our accounts to Restream.io. We can connect to multiple platforms from here. To connect our account, we must be logged into that account on the same browser. Let’s start with YouTube. Click the YouTube Stream Now button.
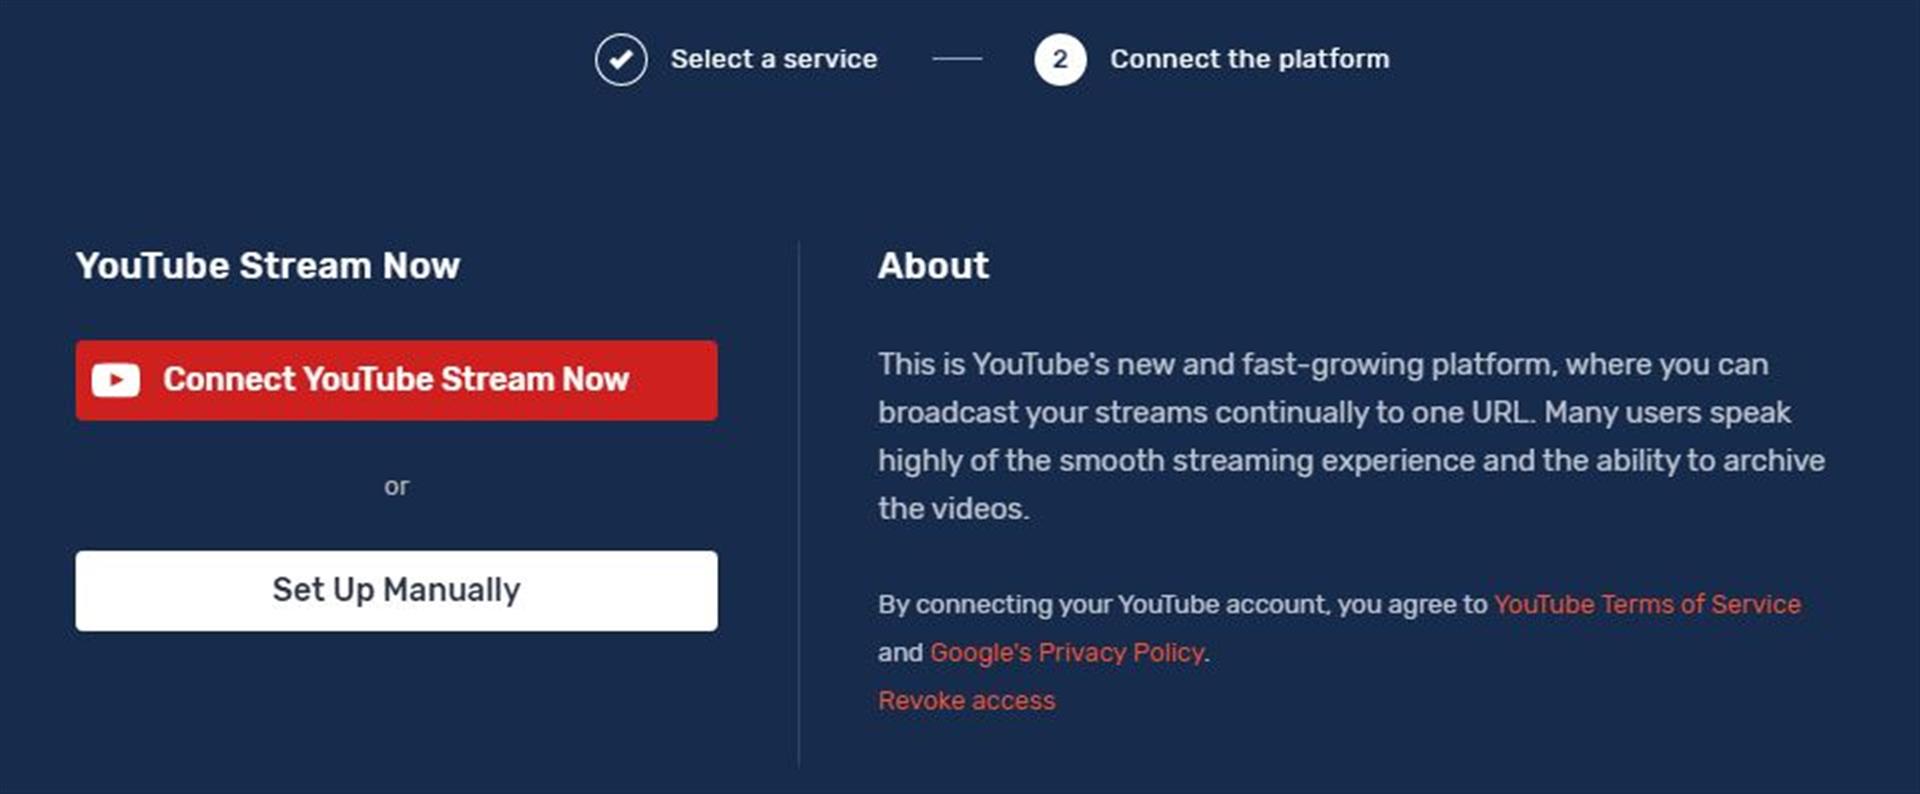
Then click Connect YouTube Stream Now.
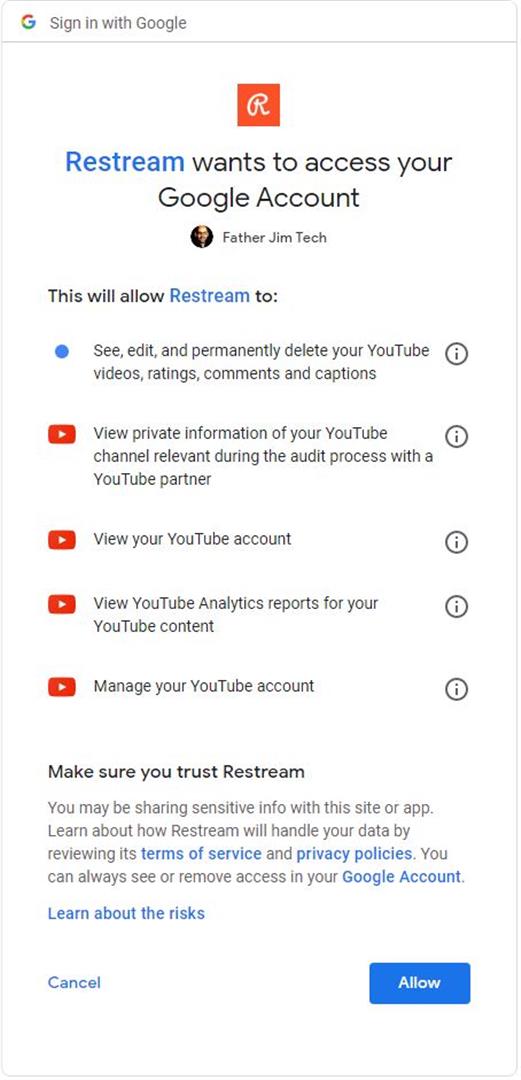
Google will ask if we want to allow Restream to access our account. This will allow Restream to stream directly to our account, and update the title text on the live stream. To allow this connection, click Allow.
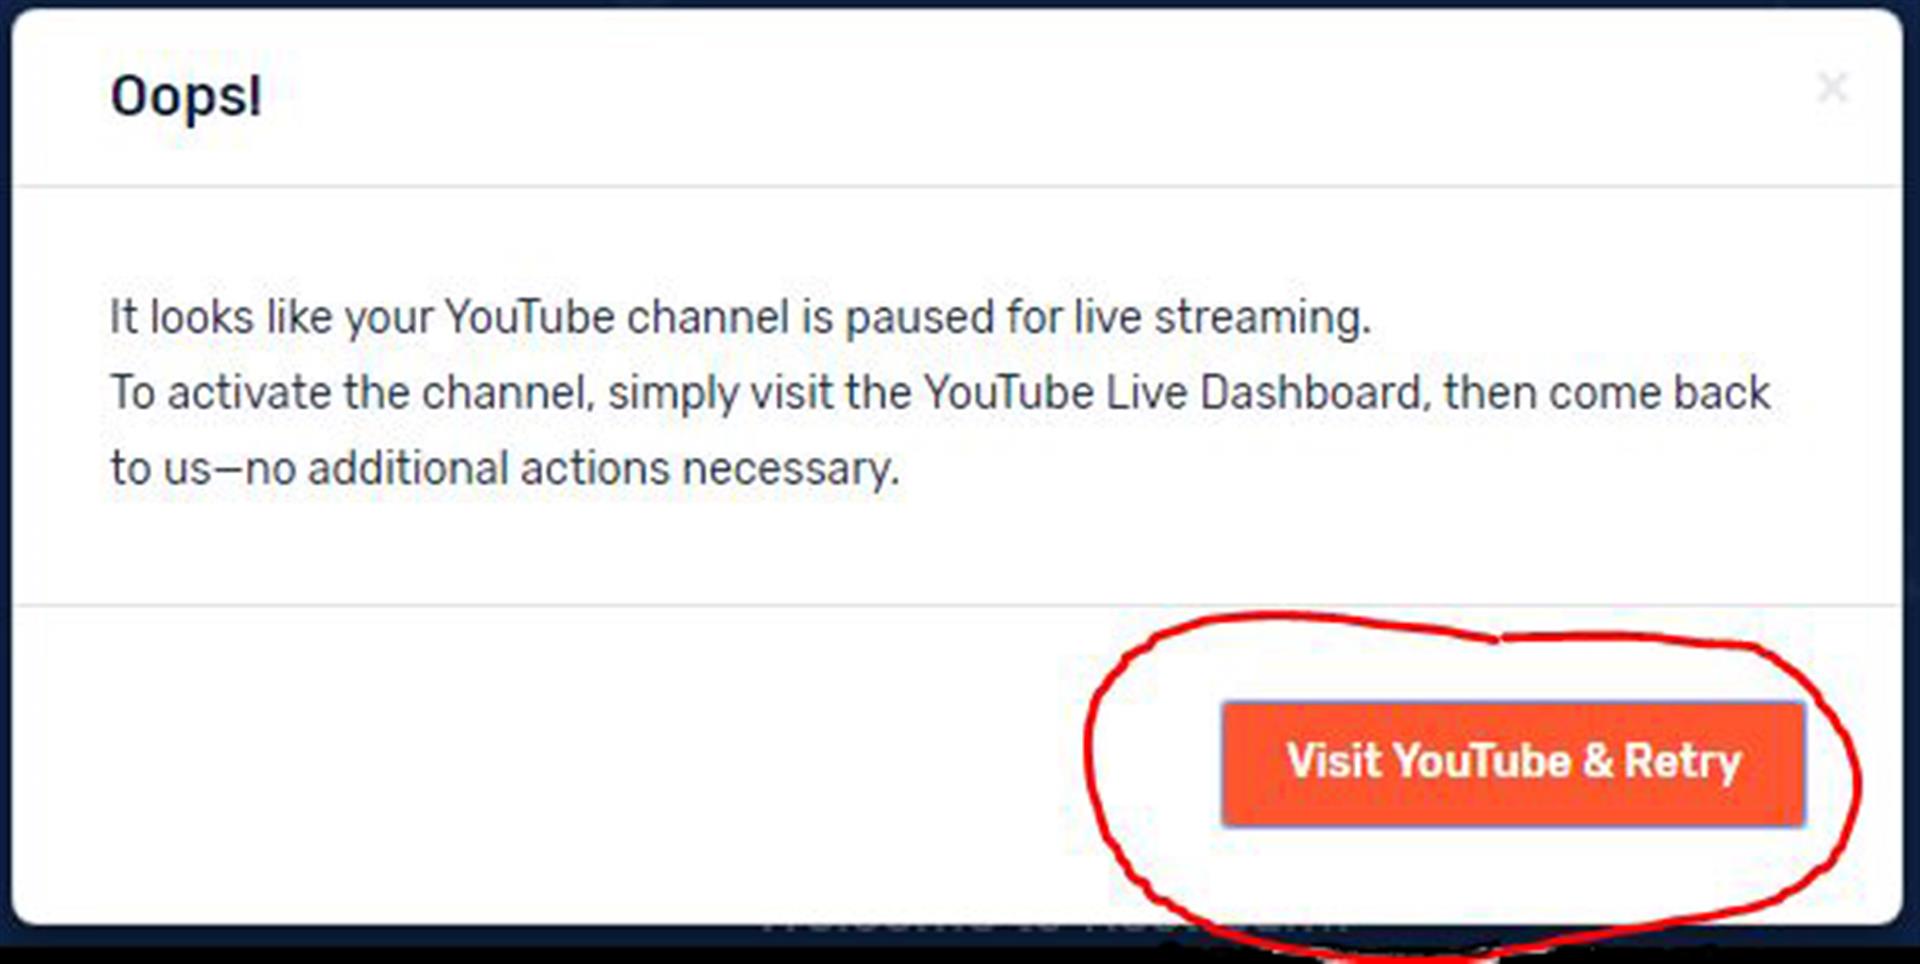
After connecting our YouTube account, Restream will show an error. This is because we have not yet setup the live streaming on YouTube. Simply click Visit YouTube & Retry to do so, then follow the instructions for configuring your YouTube livestream below.
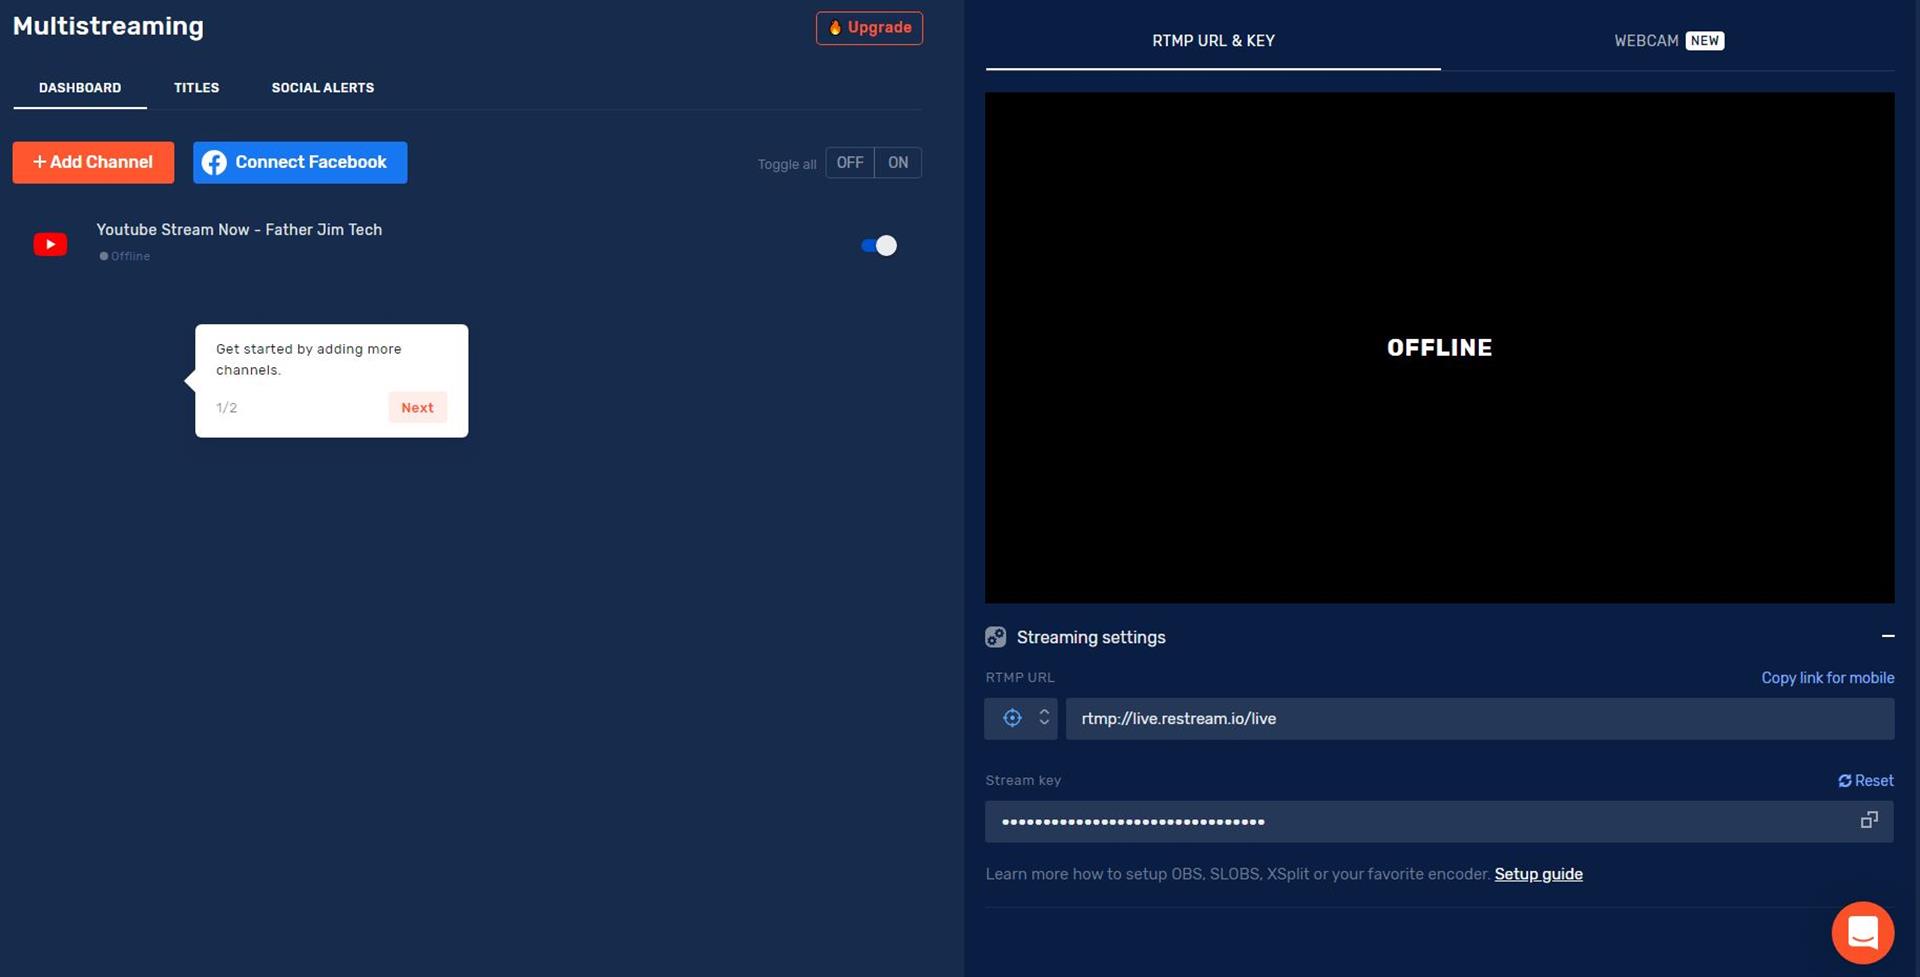
The Restream dashboard now shows we have a connection to YouTube.
Step 3 - Configure YouTube Stream Now
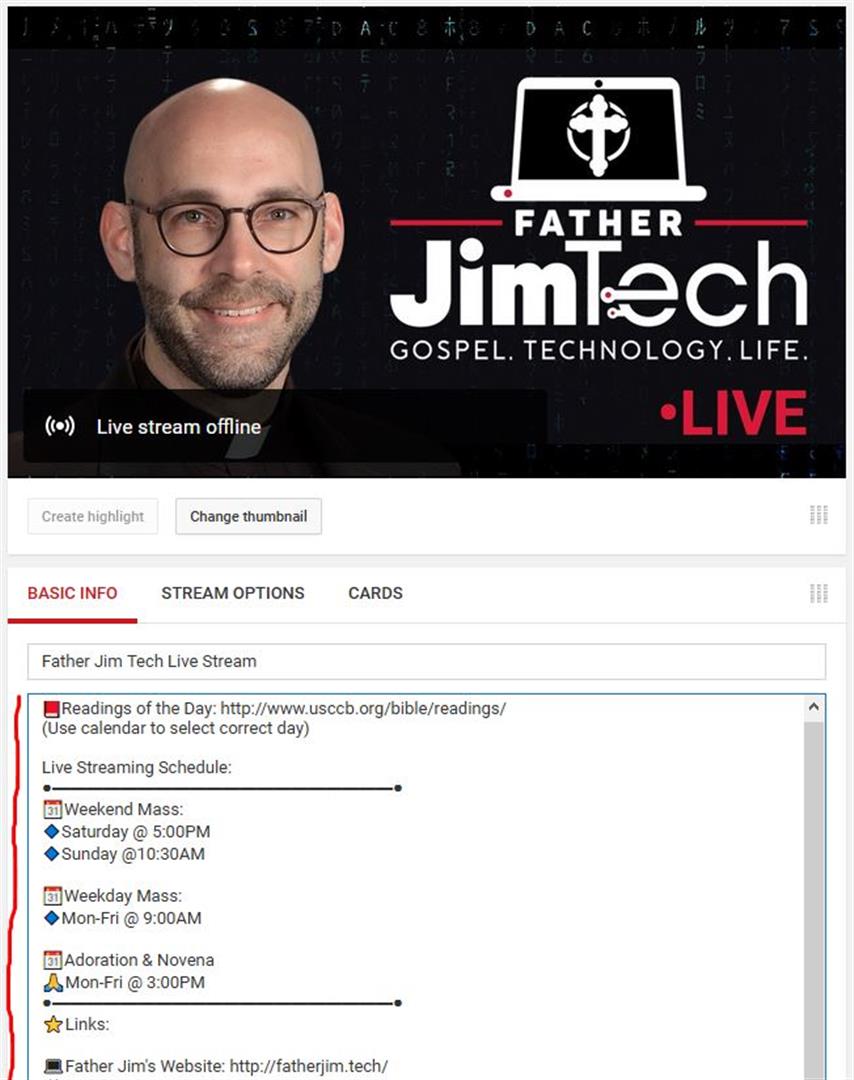
Just like Twitch, we can also add text and graphics to our stream. Click here to visit your Live Dashboard. From here, we can change the thumbnail, title, description, and privacy. YouTube uses our channel banner by default, but we can upload something else, perhaps an image with the word “live” so viewers will know that we’re live. It is recommended to set the privacy to Public otherwise no one will be able to see the stream live.
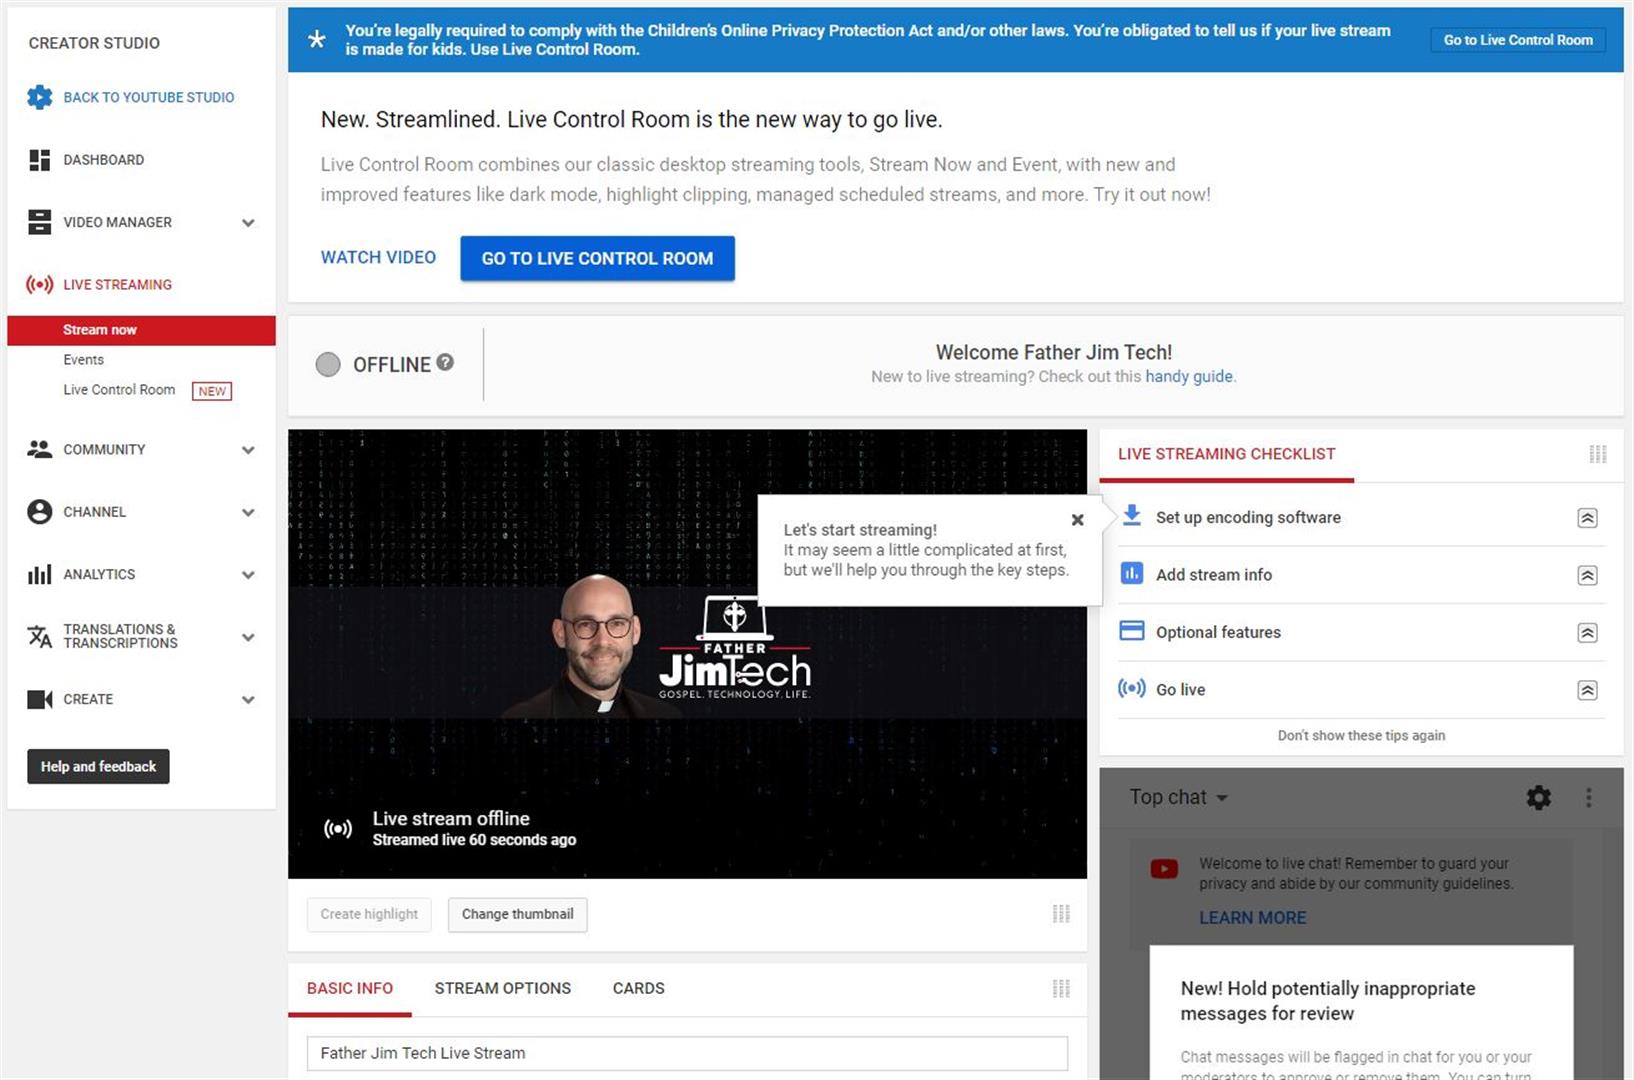
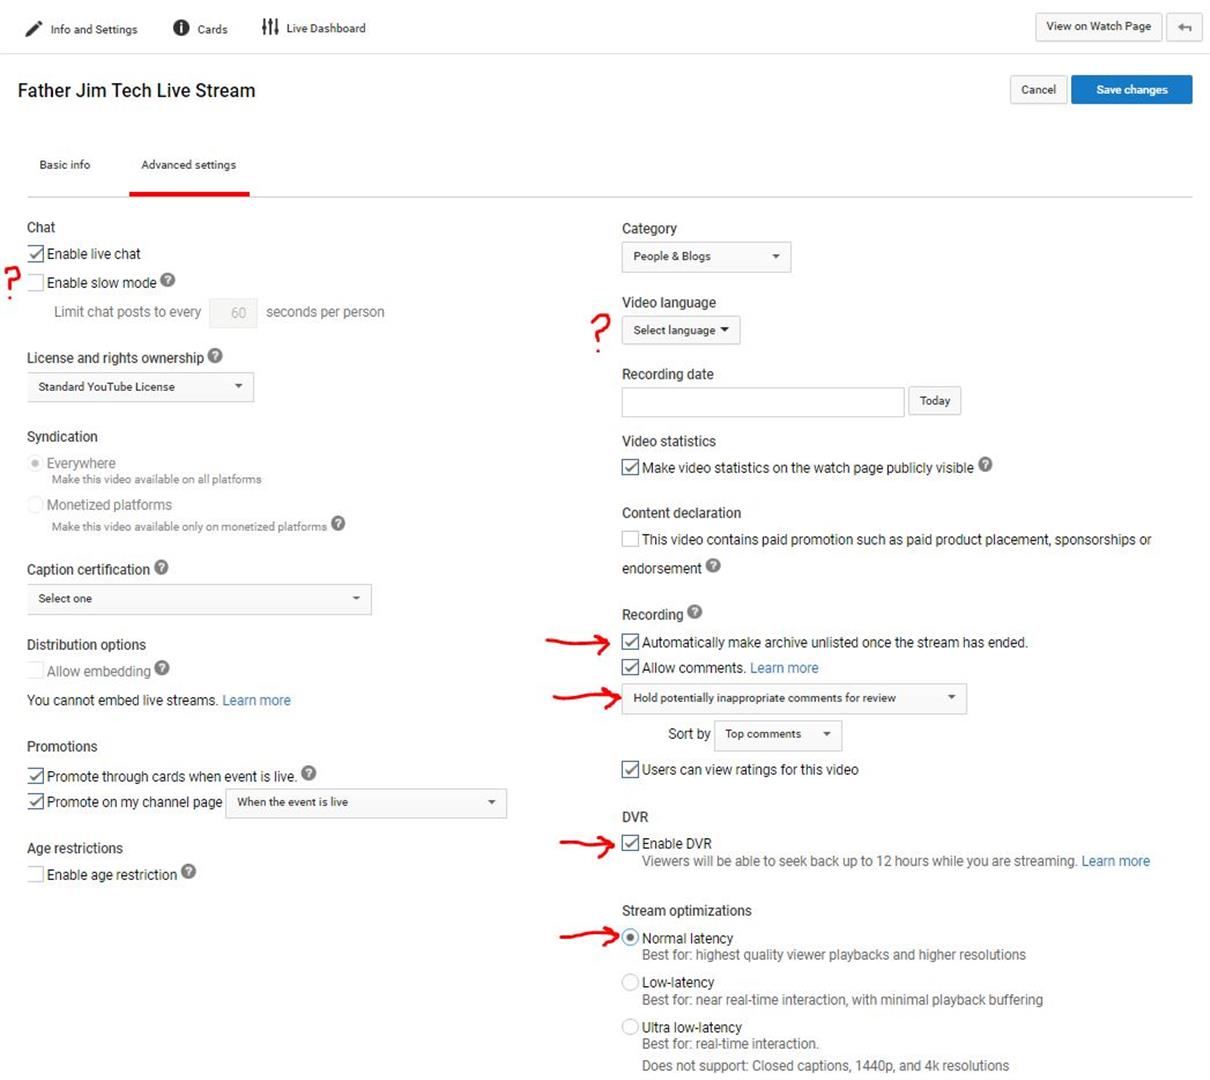
Here is an example description including a regular streaming schedule and a link to our website. When finished updating basic information, click on the Advanced settings link.
There are several items for consideration on the Advanced settings tab. If hundreds of viewers are anticipated, it may be good to enable slow mode under chat. This will reduce the speed at which everyone’s chat comments appear. We may also want to set the video language. Under Recording, be sure to check Automatically make archive unlisted once the stream has ended. This will give us an opportunity to edit the video after the stream. Also, set the comment filter accordingly. Then, check Enable DVR, which will make it so viewers who come late to the stream can scrub back to the beginning. Finally, set the stream optimization. Normal latency will yield the highest quality, but adds a longer delay. Low-latency is the default, and works well for live interaction with the audience through chat.
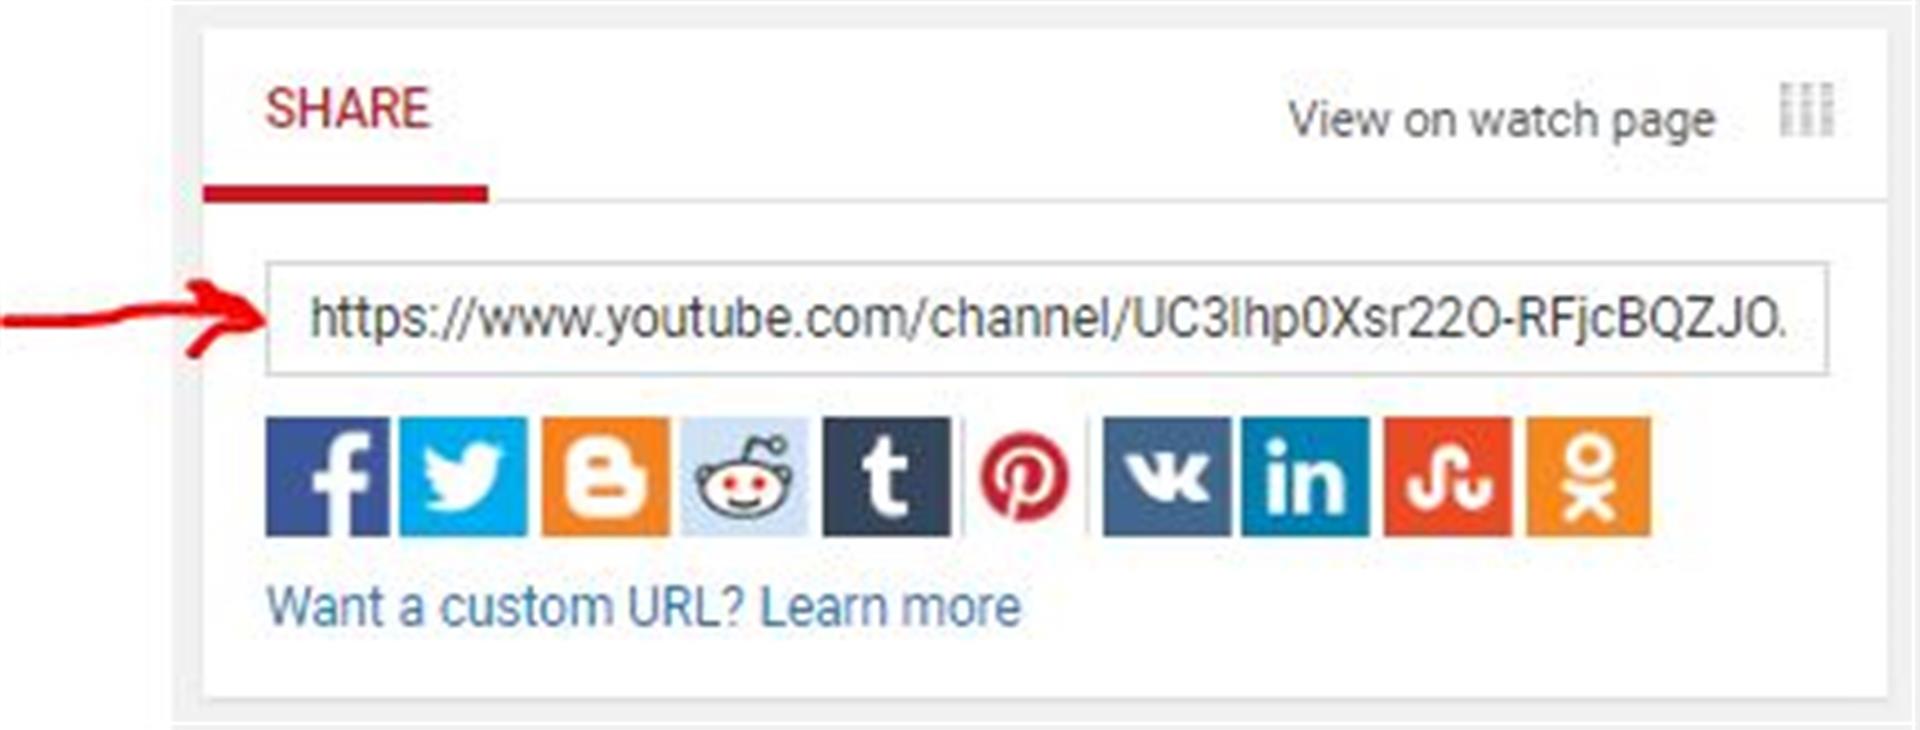
Lastly, back on the Live Dashboard, scroll down to the bottom to reveal the link to the live stream. This is good for posting on our website or social media sites.
Step 4 - Install & Configure StreamLabs
On Android & iOS Devices
Now it’s time to install an app on our mobile device. StreamLabs is FOSS (Free & Open Source Software) powered by Open Broadcaster Studio (OBS for short), which enables us to easily capture video & audio from our mobile device and stream it to any platform. We will use StreamLabs to connect to Restream.io so we can stream to multiple platforms at once.
From the Play Store or App Store, we’ll search for StreamLabs and install it on our device.
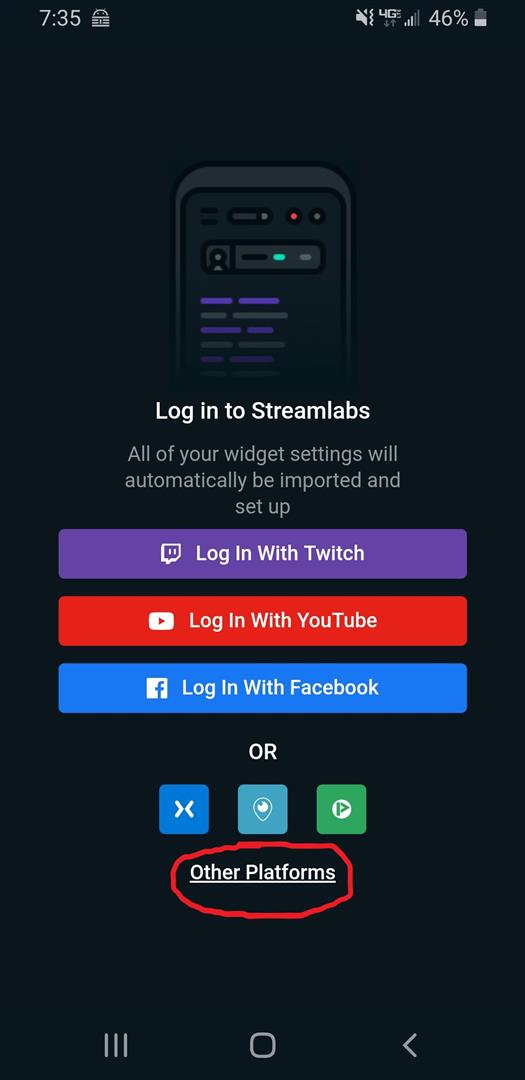
Launch Streamlabs and click on the link for Other Platforms
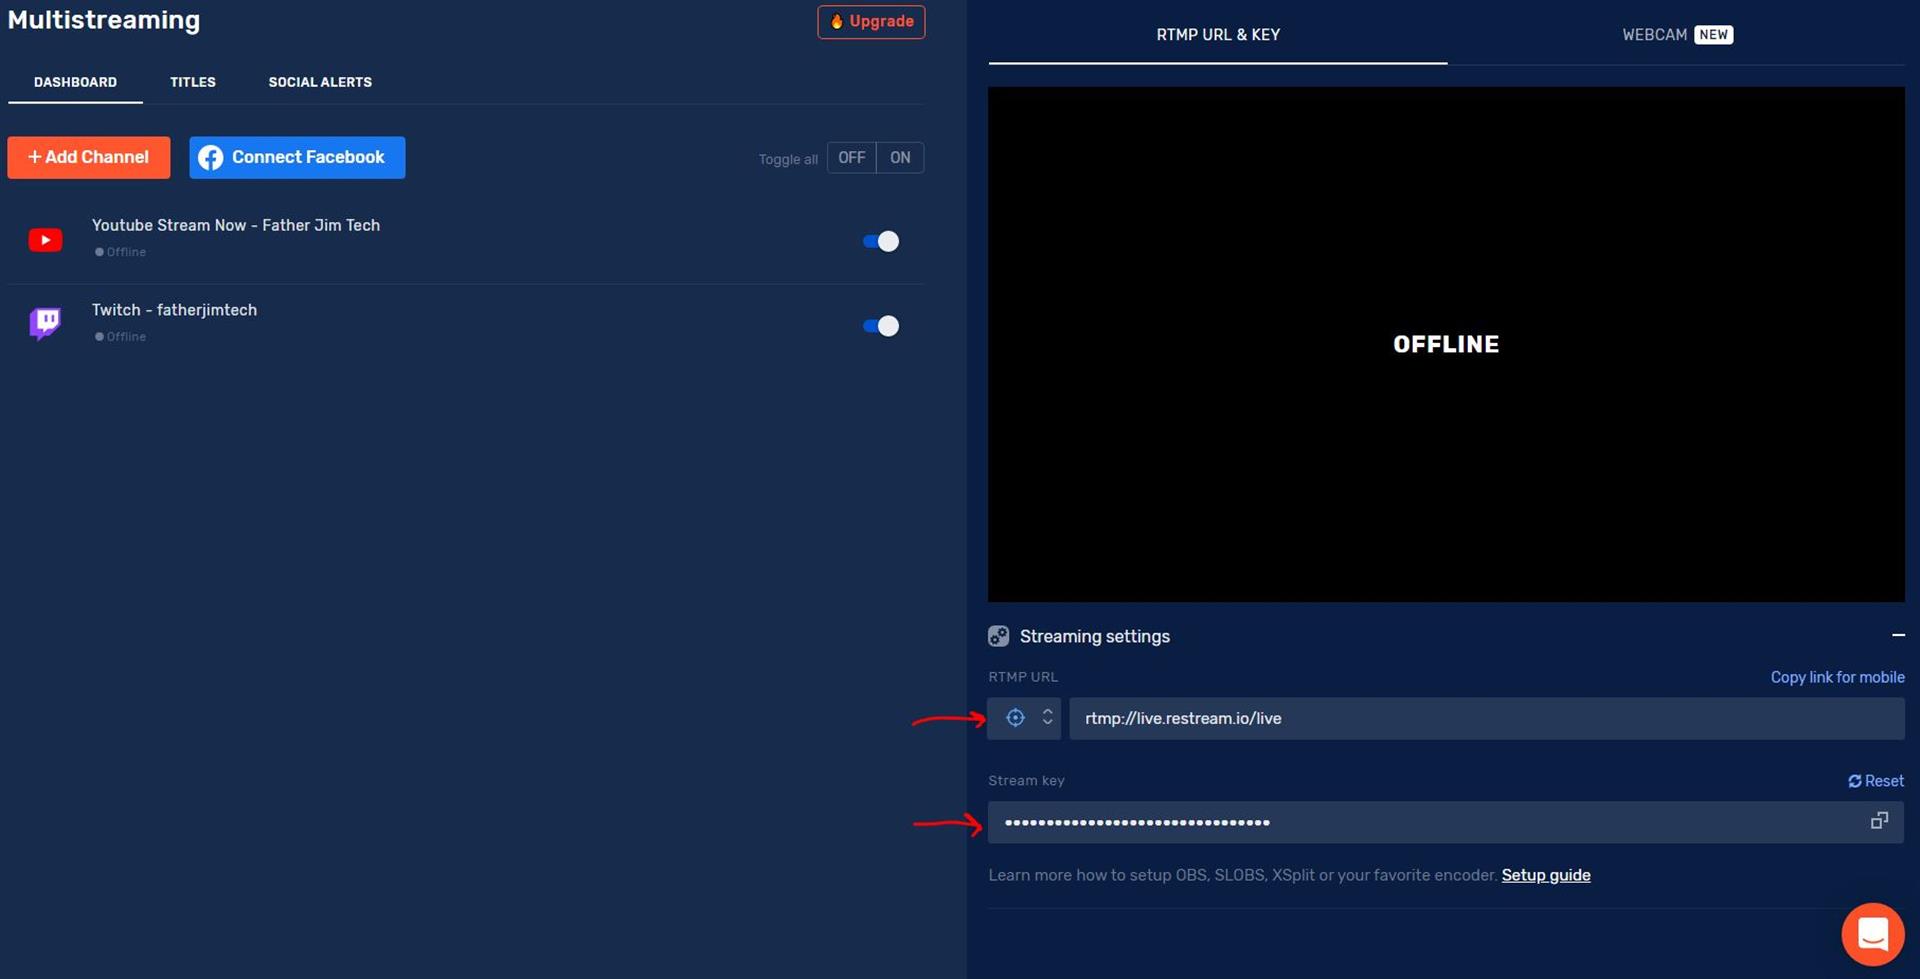
To connect Streamlabs to our Restream account, we will need the URL and stream key from our Restream Dashboard. (To reveal the stream key, just click on the dots.)
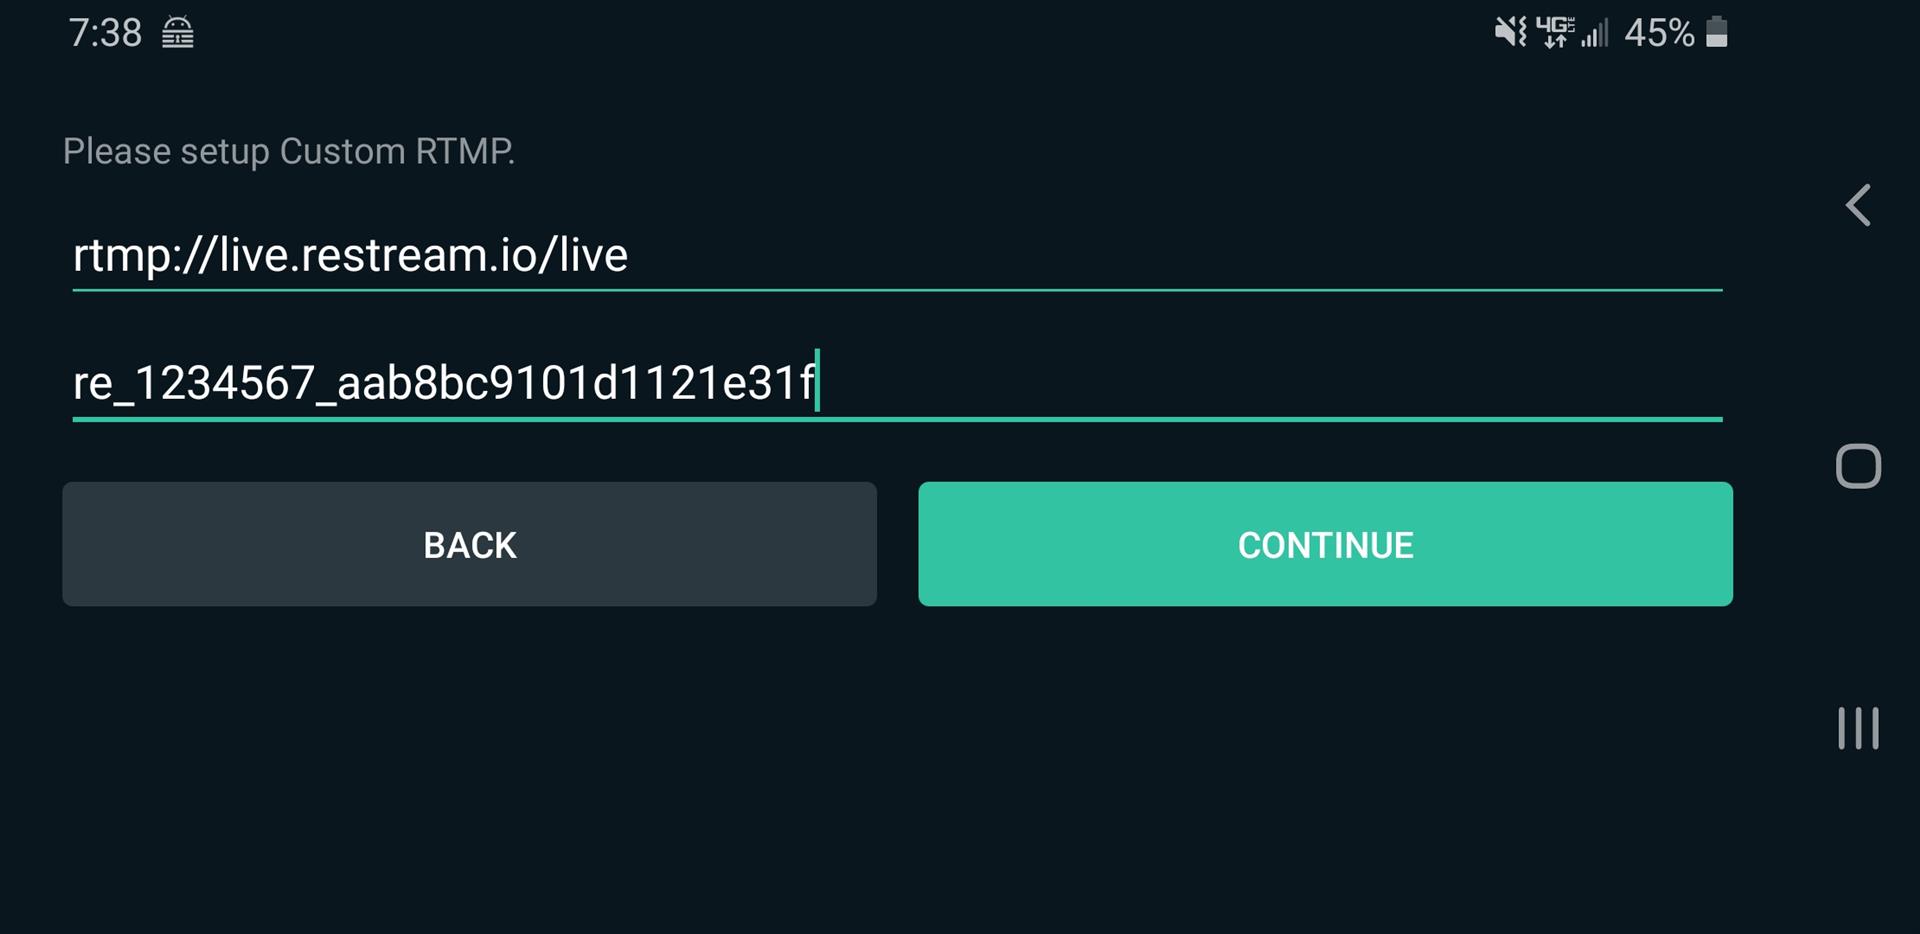
On our mobile device, enter the URL and stream key into Streamlabs and tap continue.
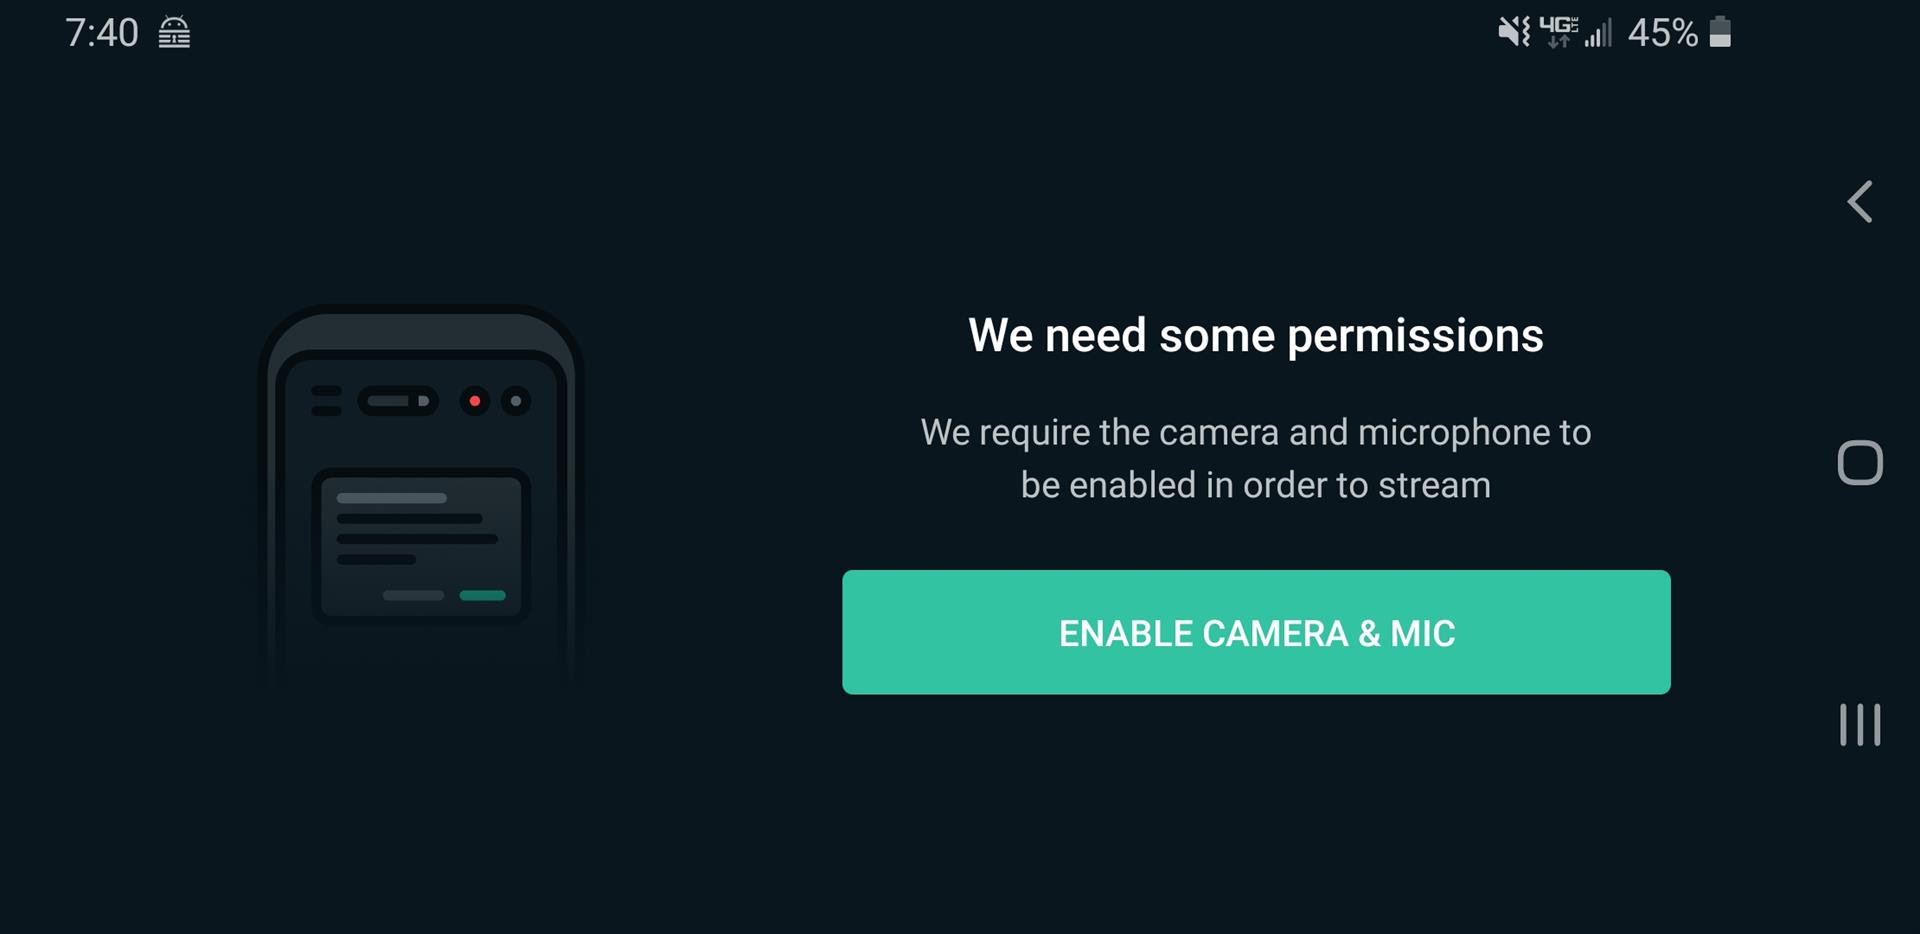
Be sure to Enable Camera & Mic, otherwise we will not be able to capture from those devices.
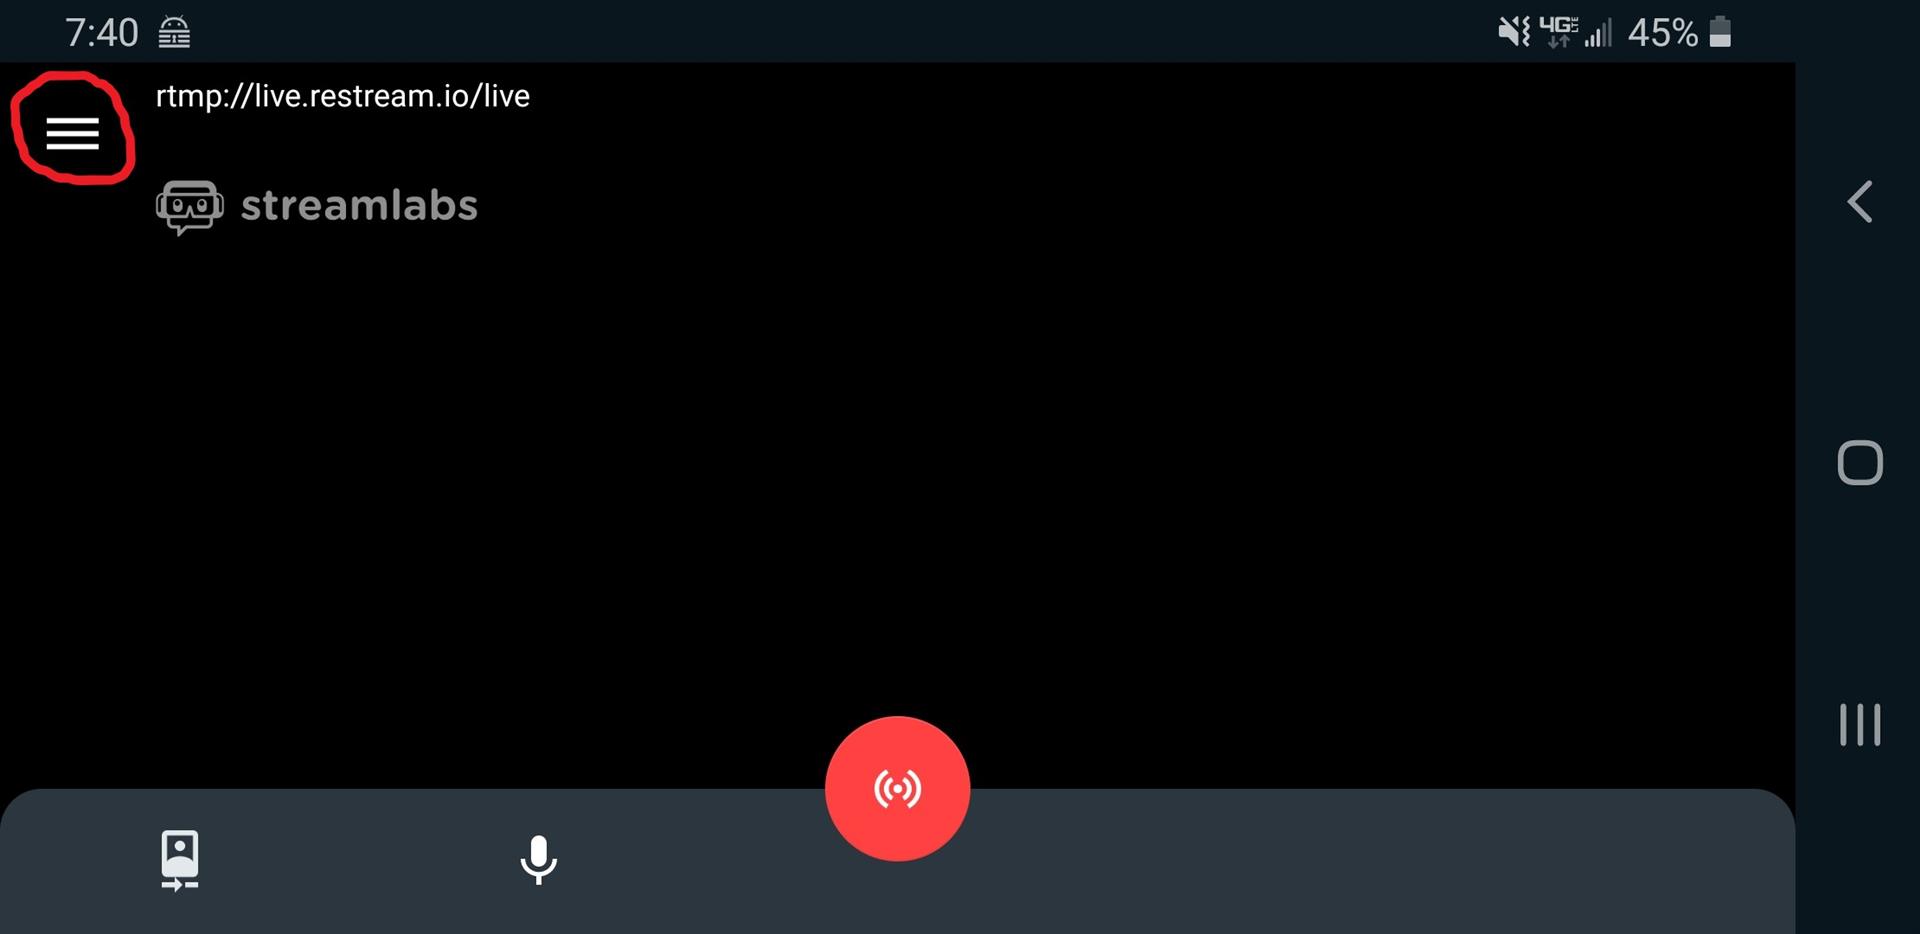
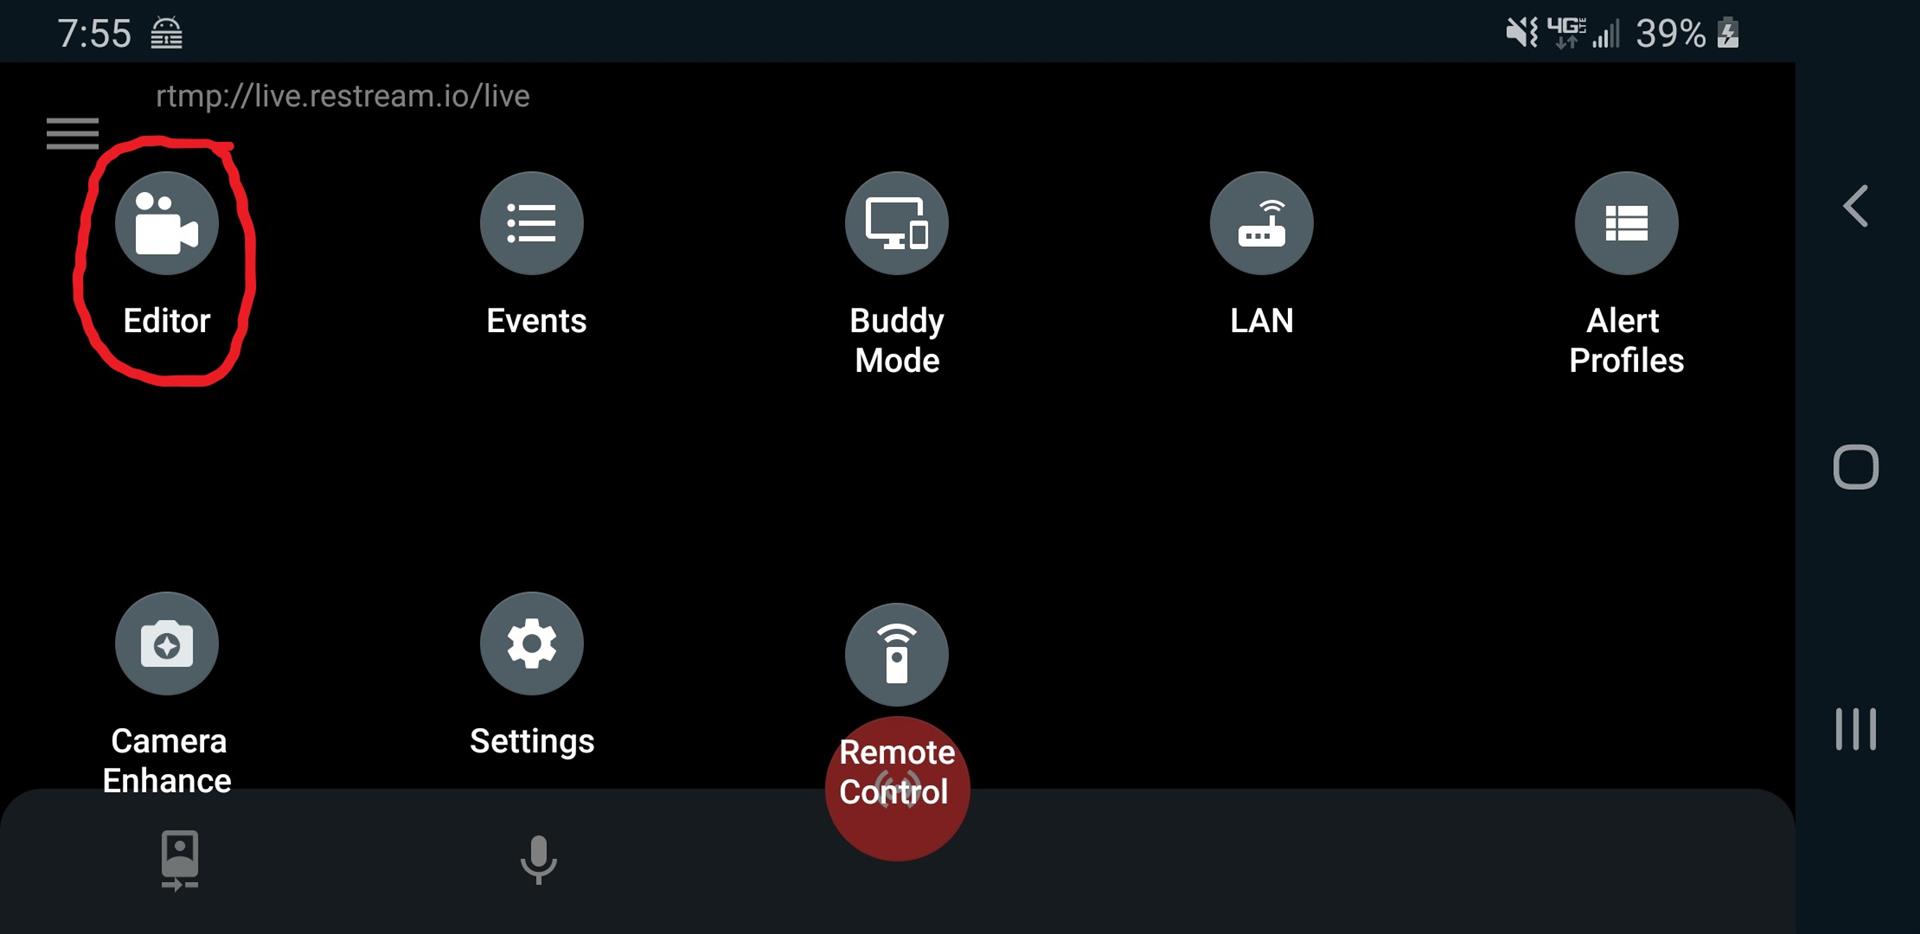
This is the main window, but it’s not configured to stream anything yet. Let’s set that up. Tap the pancake menu to reveal additional settings.
Next, tap Editor.
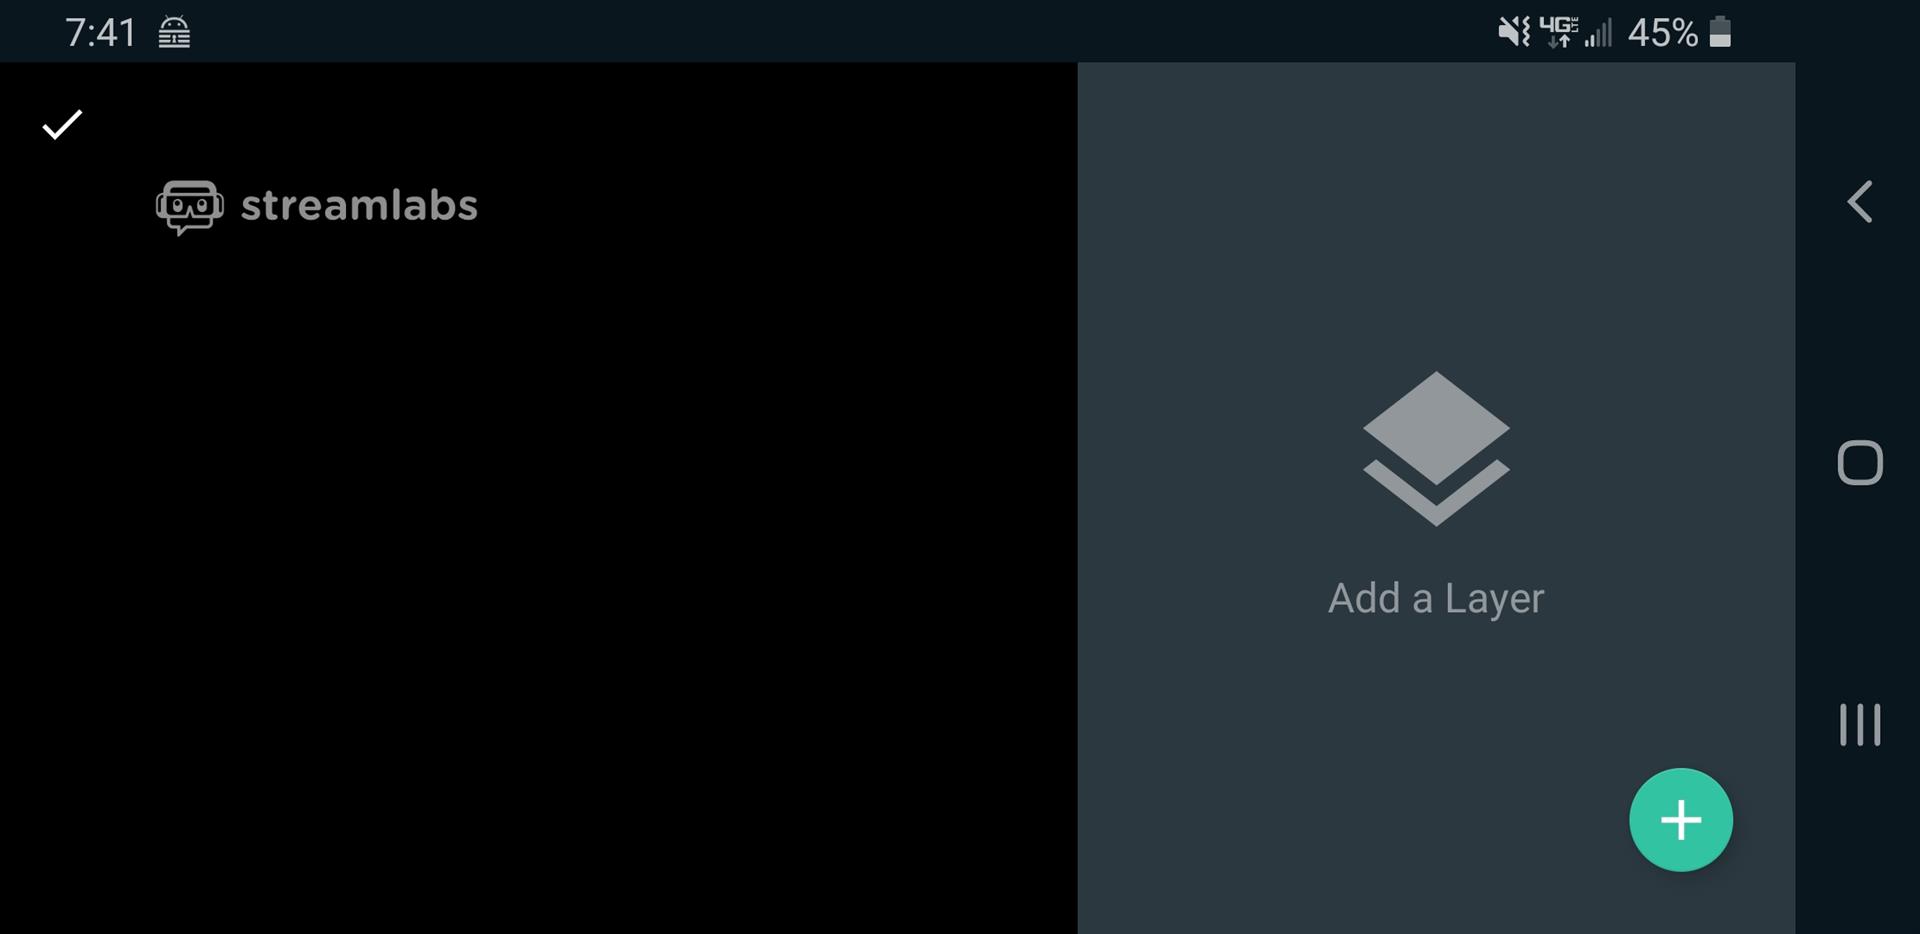
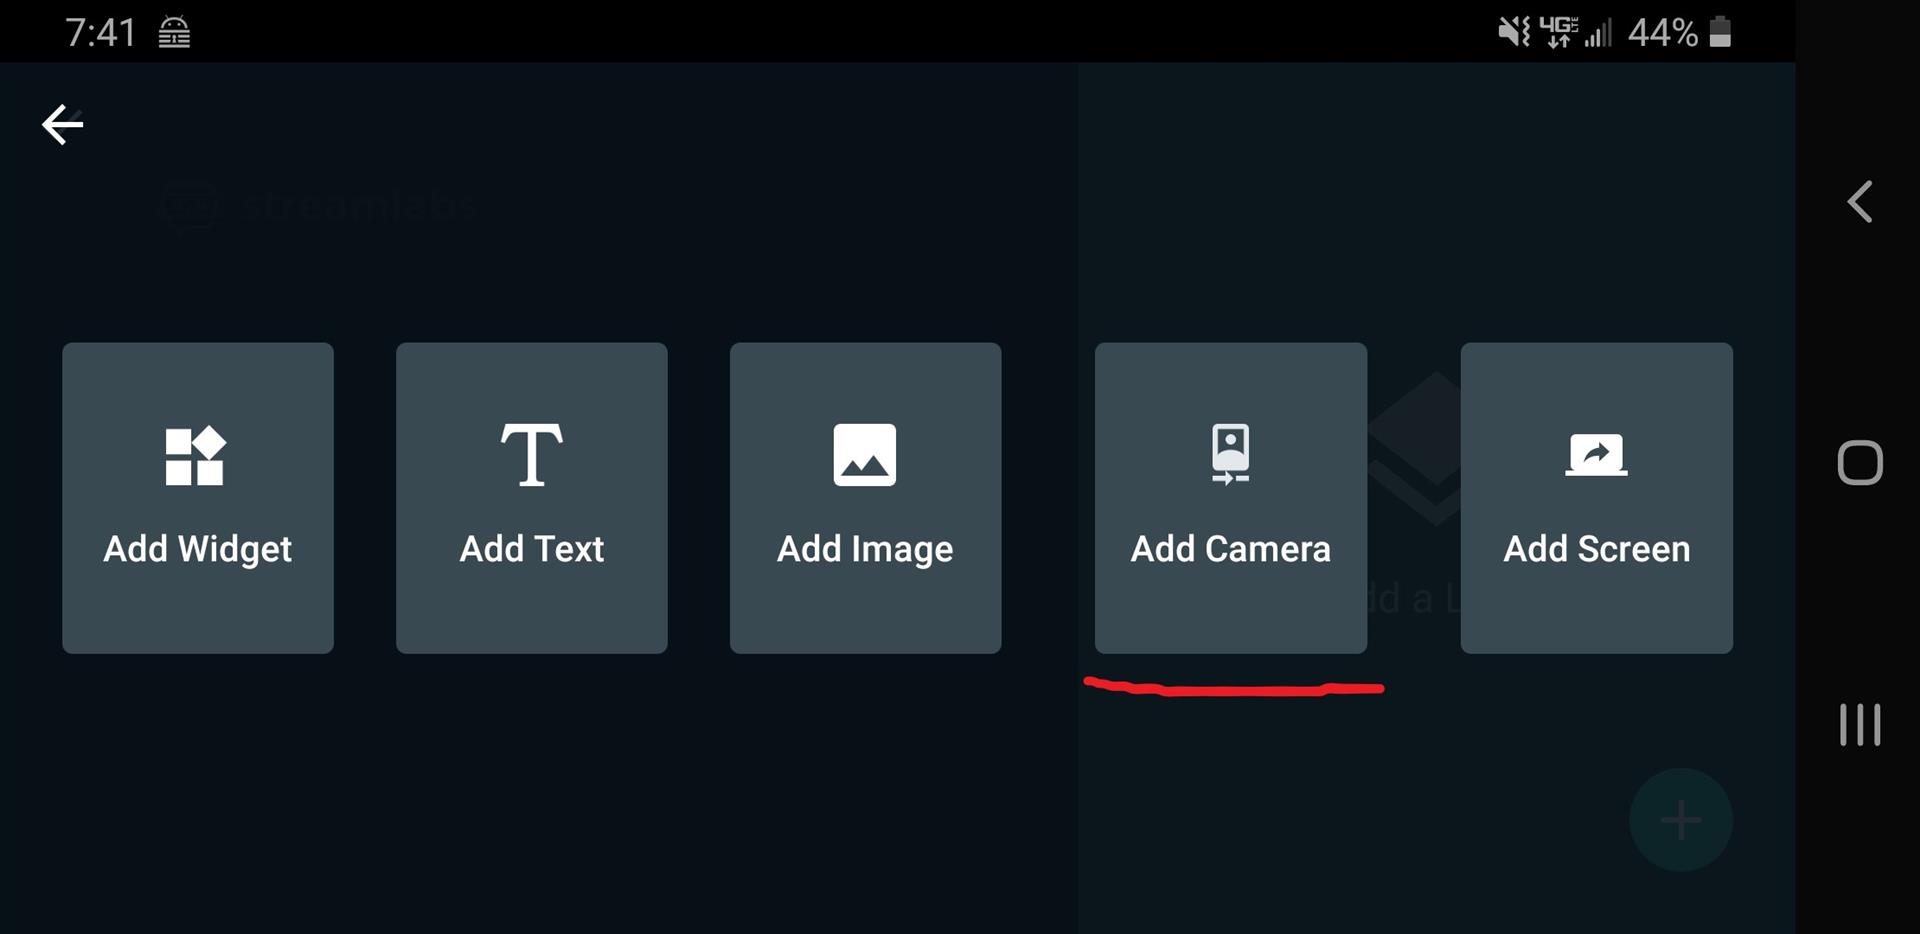
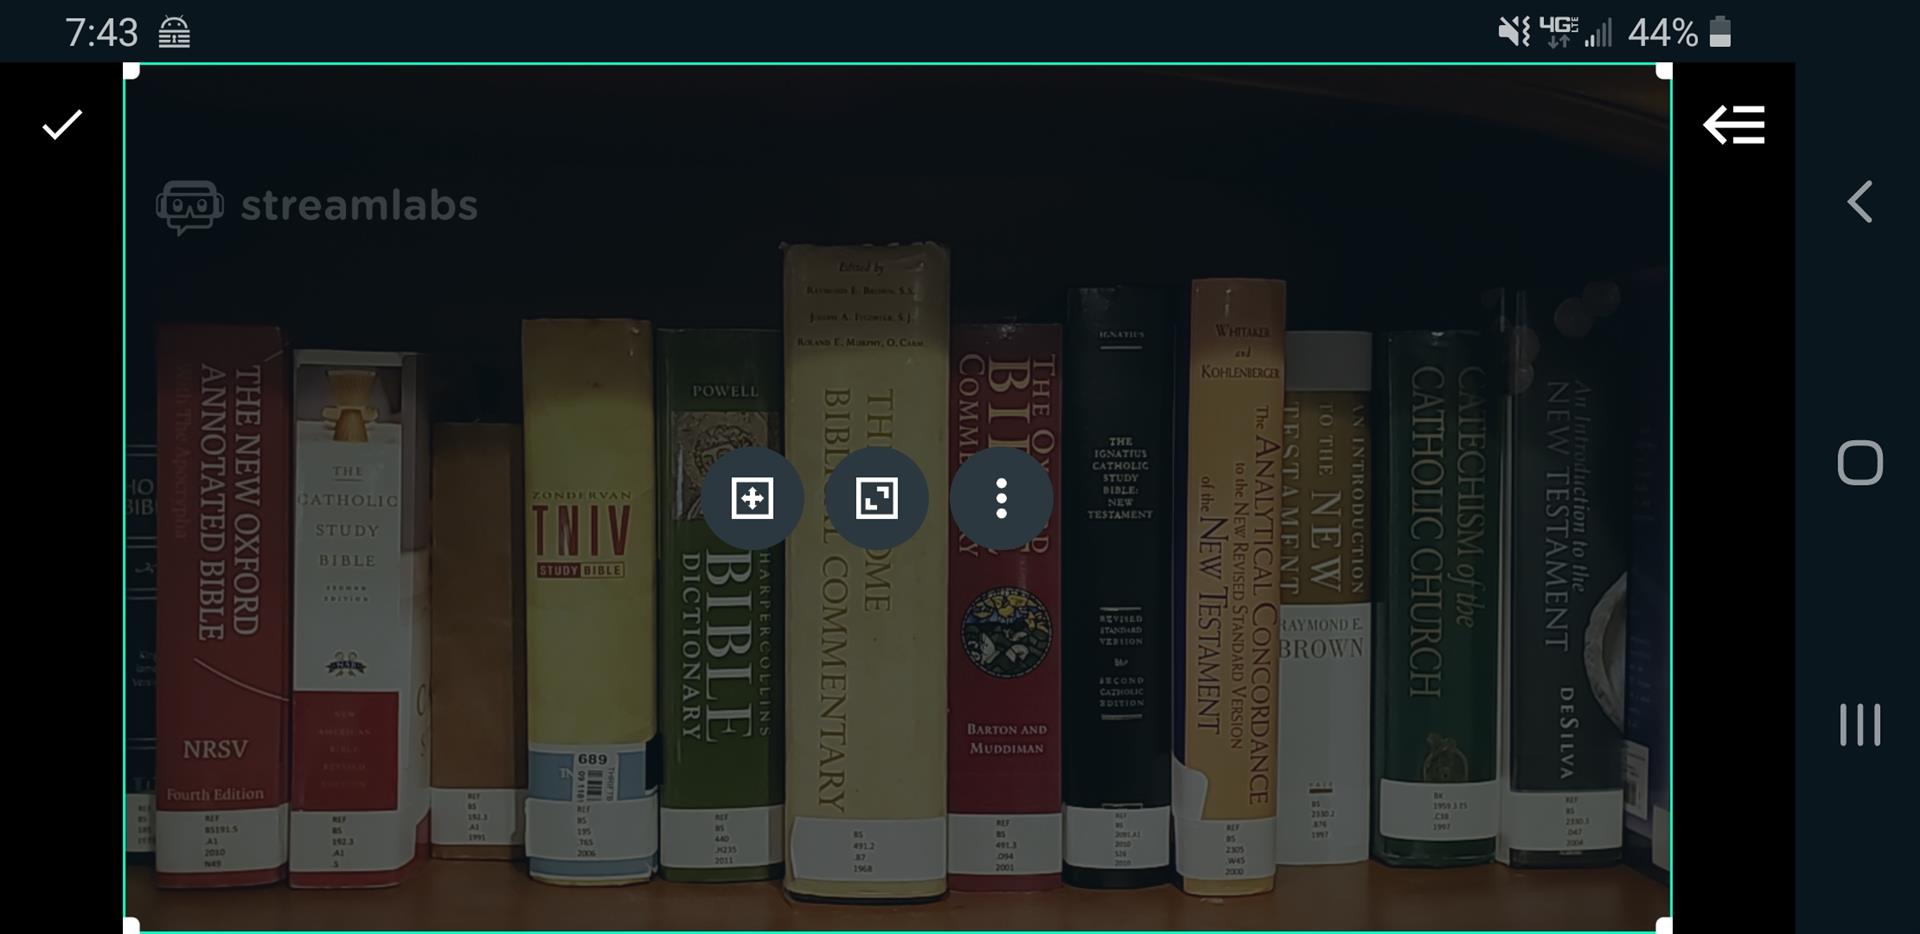
From here, we will create a new scene (just like the desktop version of OBS). Let’s add a camera layer by tapping the +.
Then tap Add Camera.
The camera should now display on the screen. Tap the check mark to accept the changes.
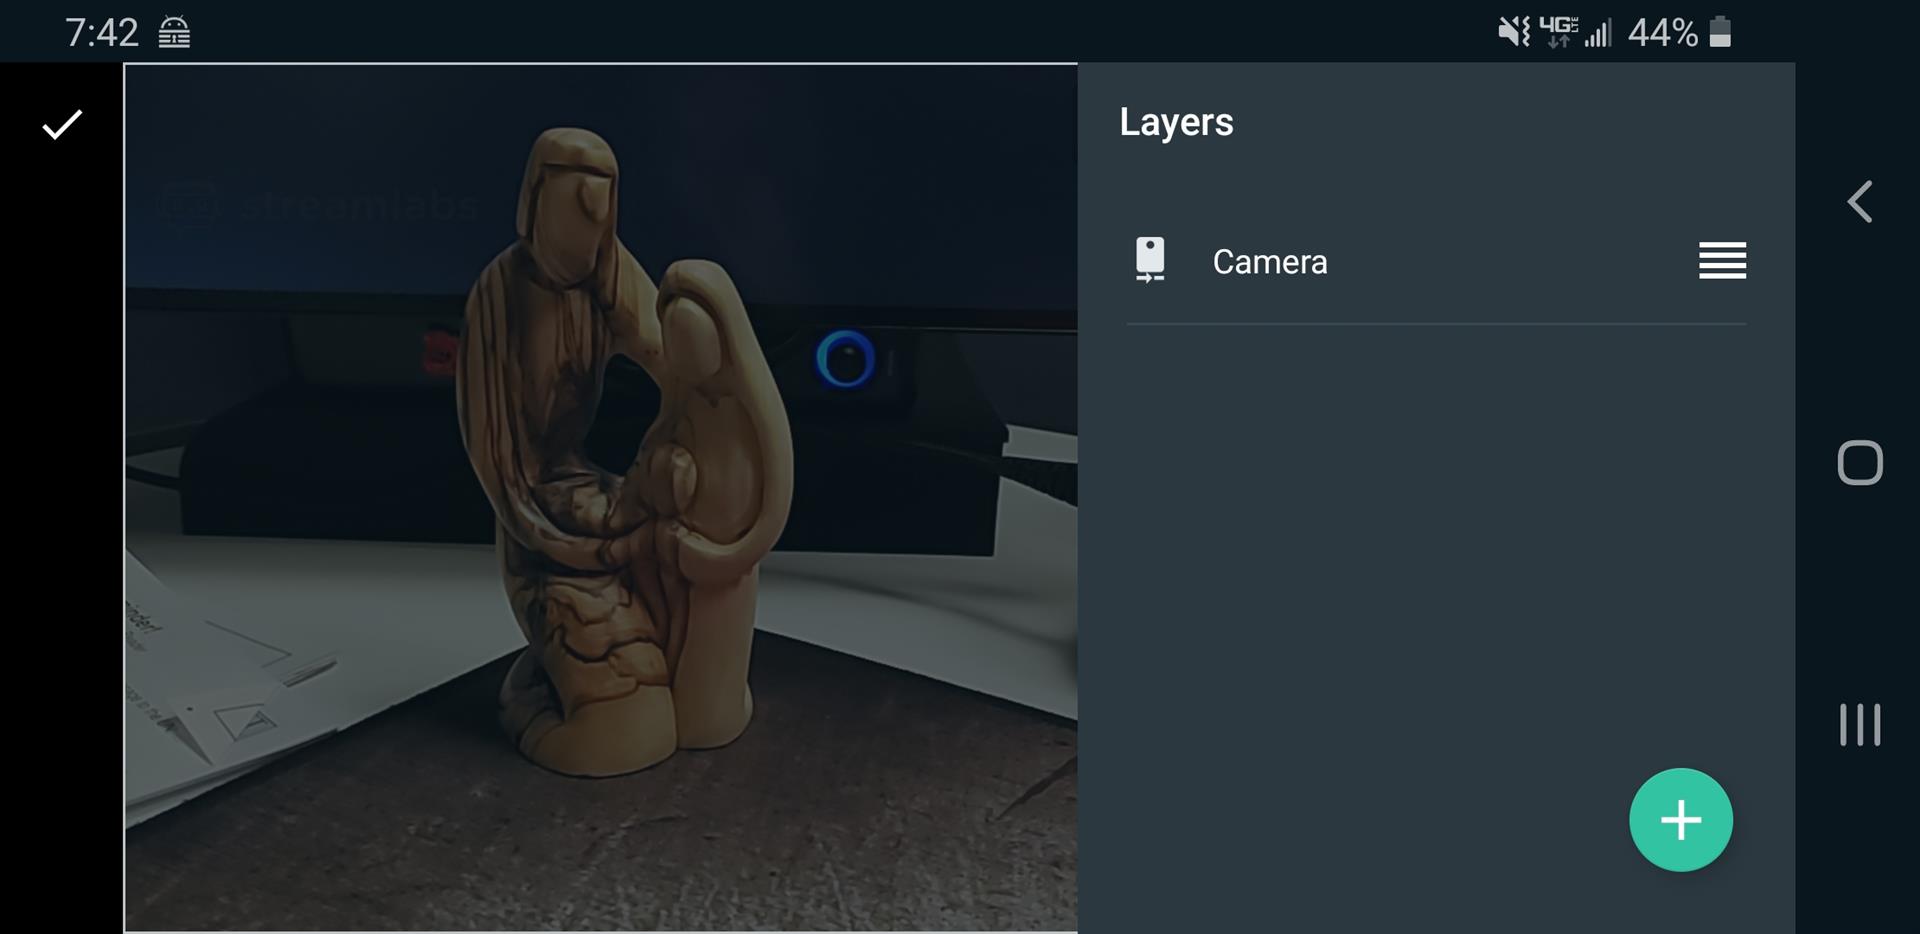
We can resize the window by dragging the corners as needed. The default is full screen. Once again, tap the check mark to save and retun to the main window.
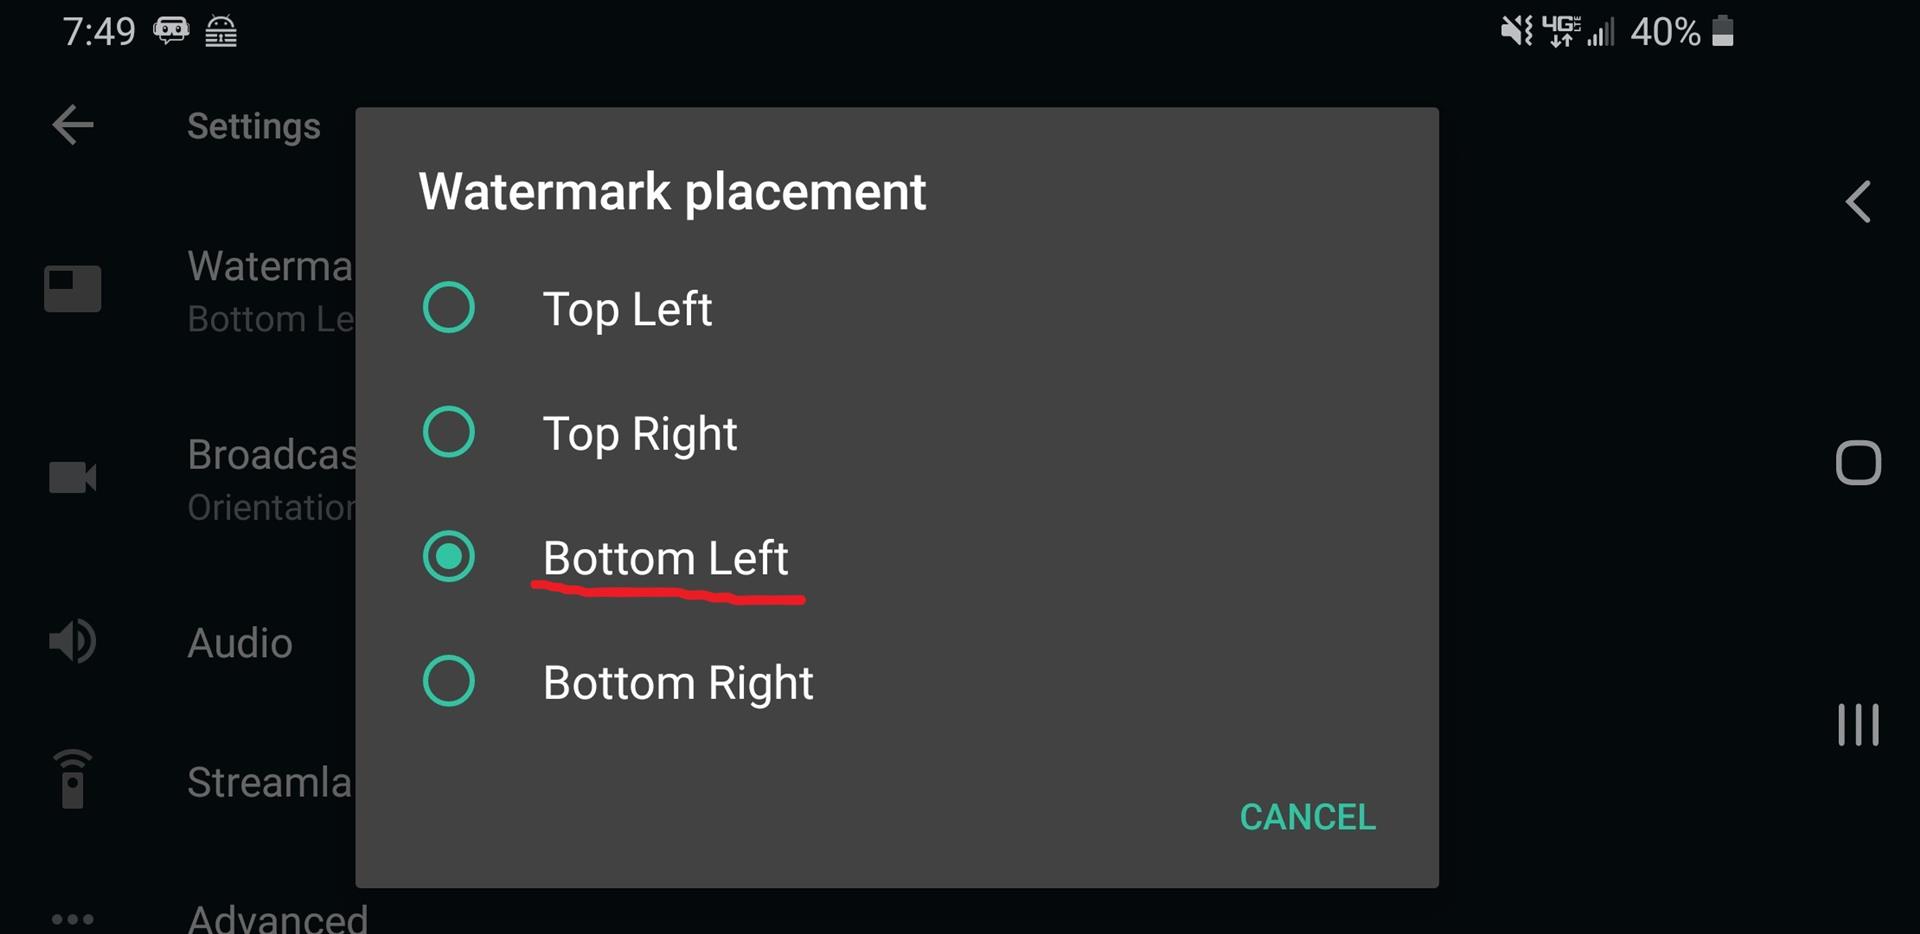
One last setting is to move the StreamLabs watermark to a more reasonable location. From the Main Menu, tap Settings.
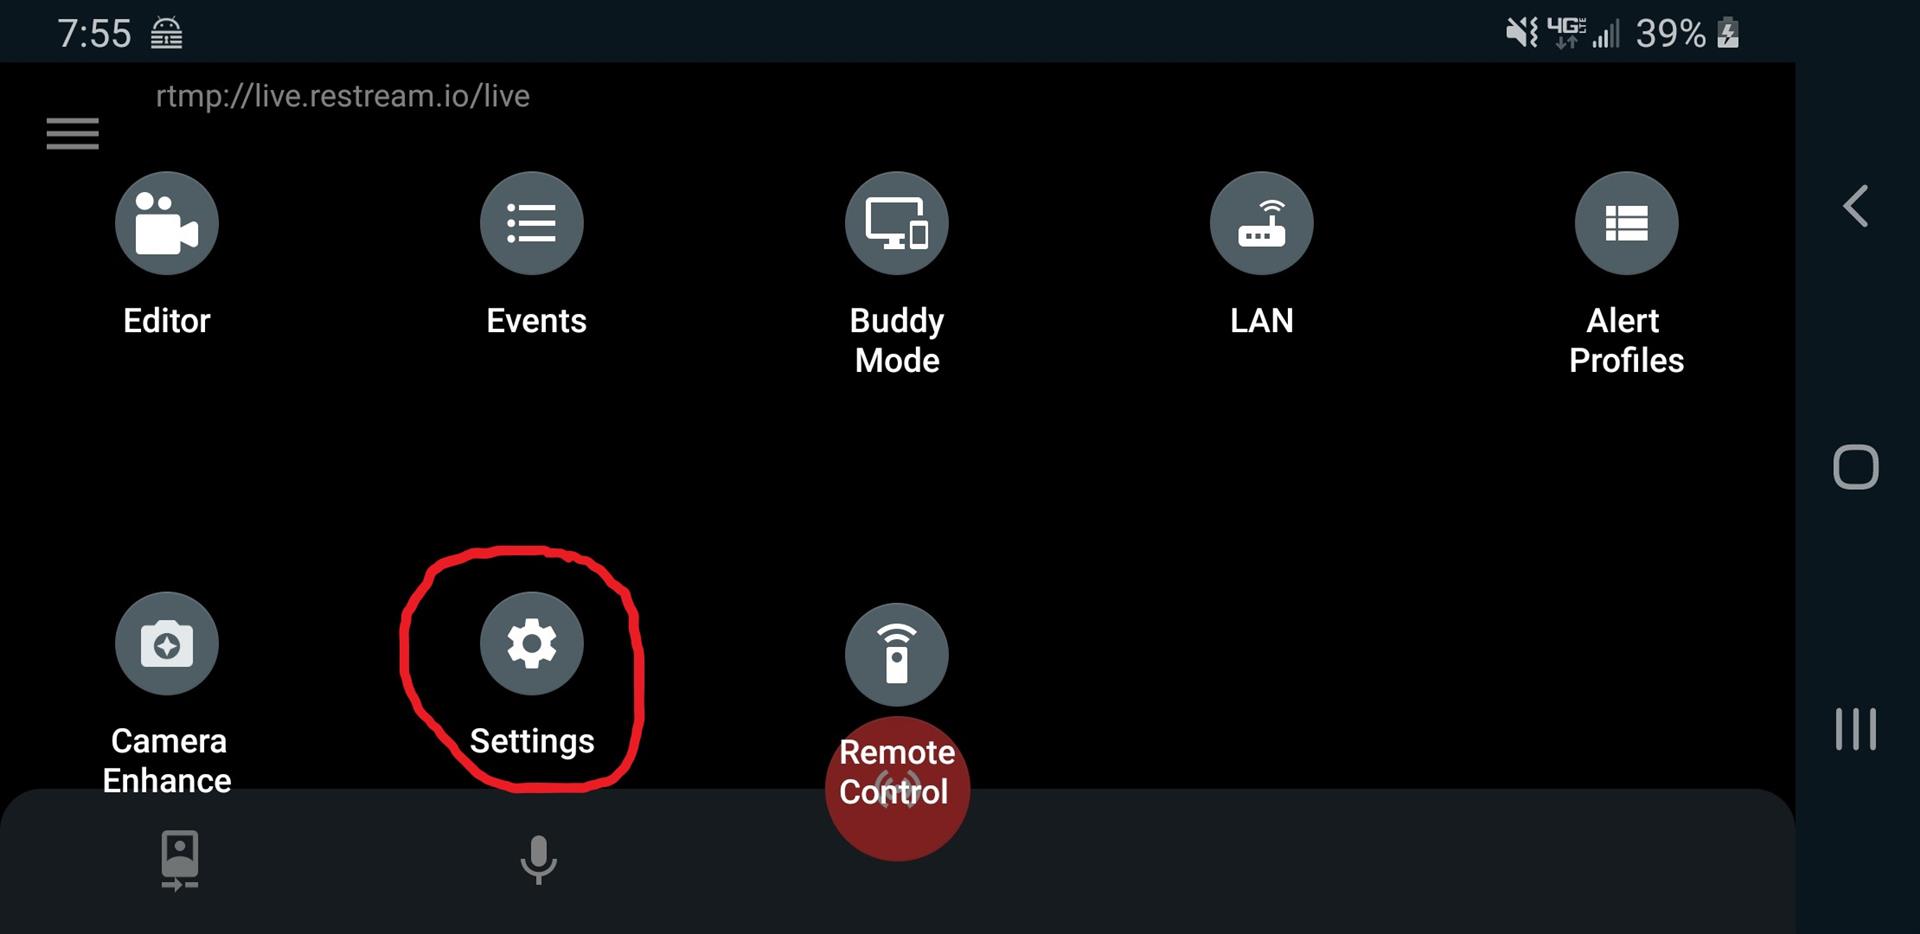
Scroll down to Watermark placement…
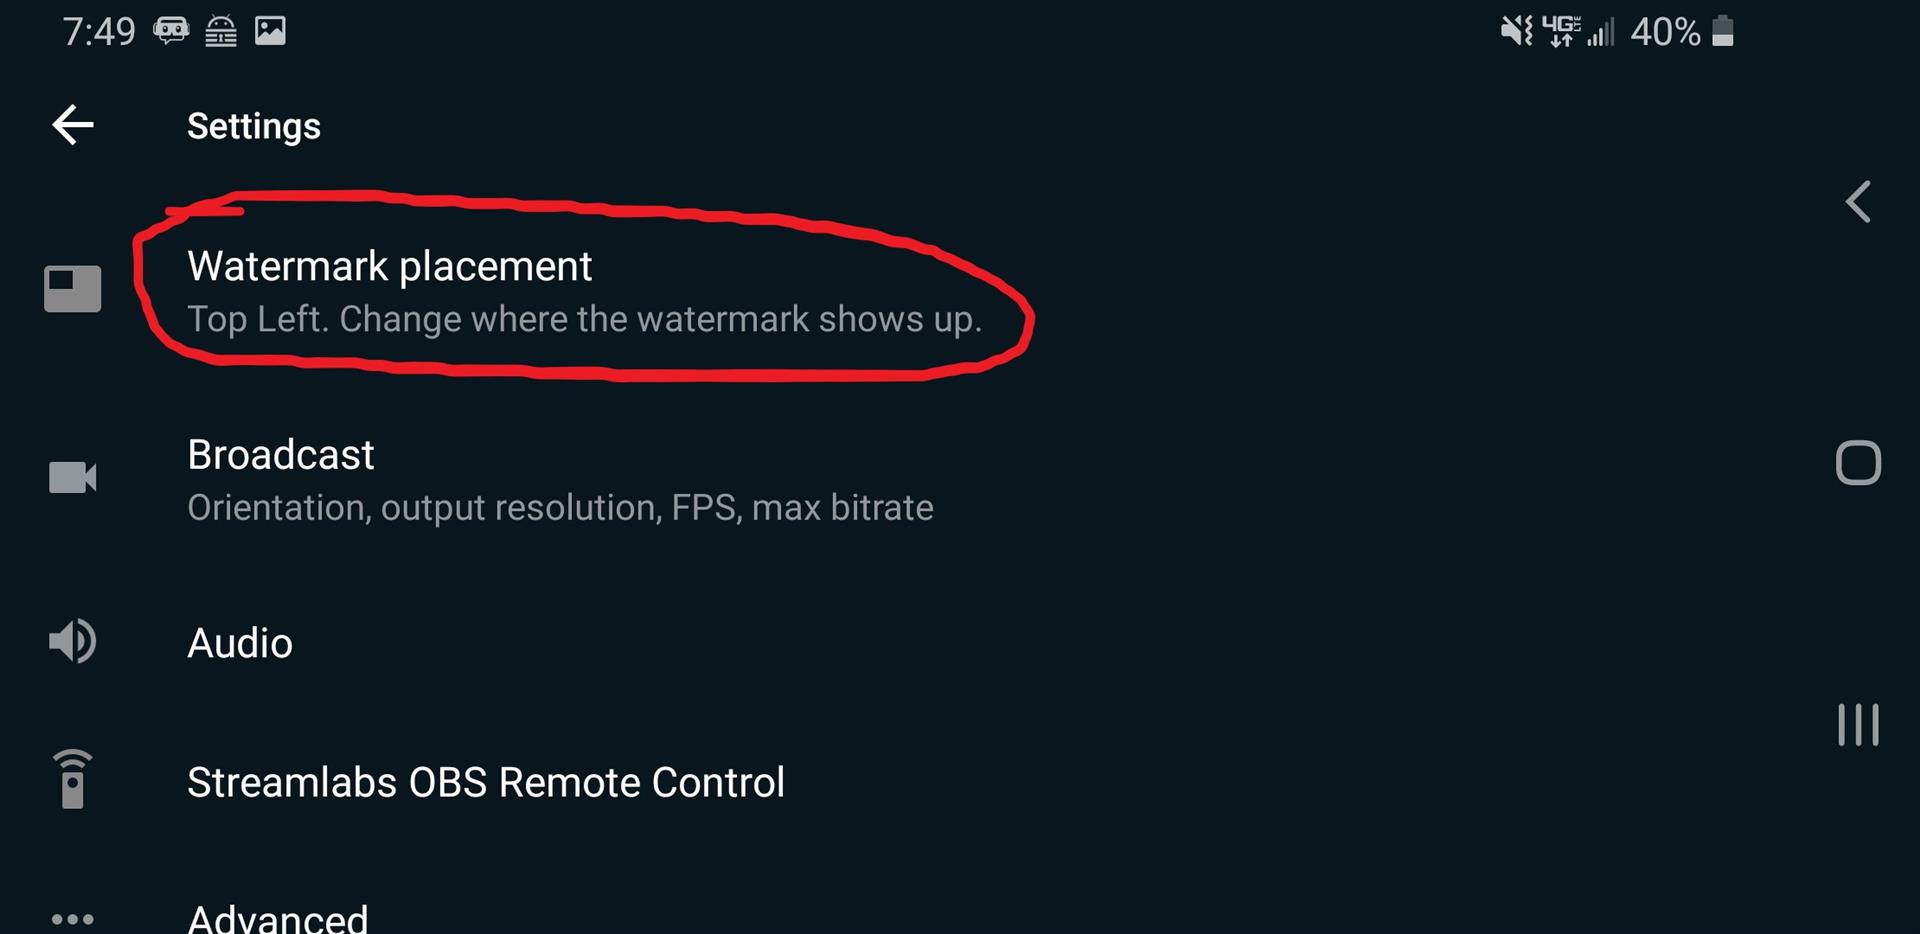
…and set it to Bottom Left.
We are now ready to test our stream.
Step 5 - Testing The Stream
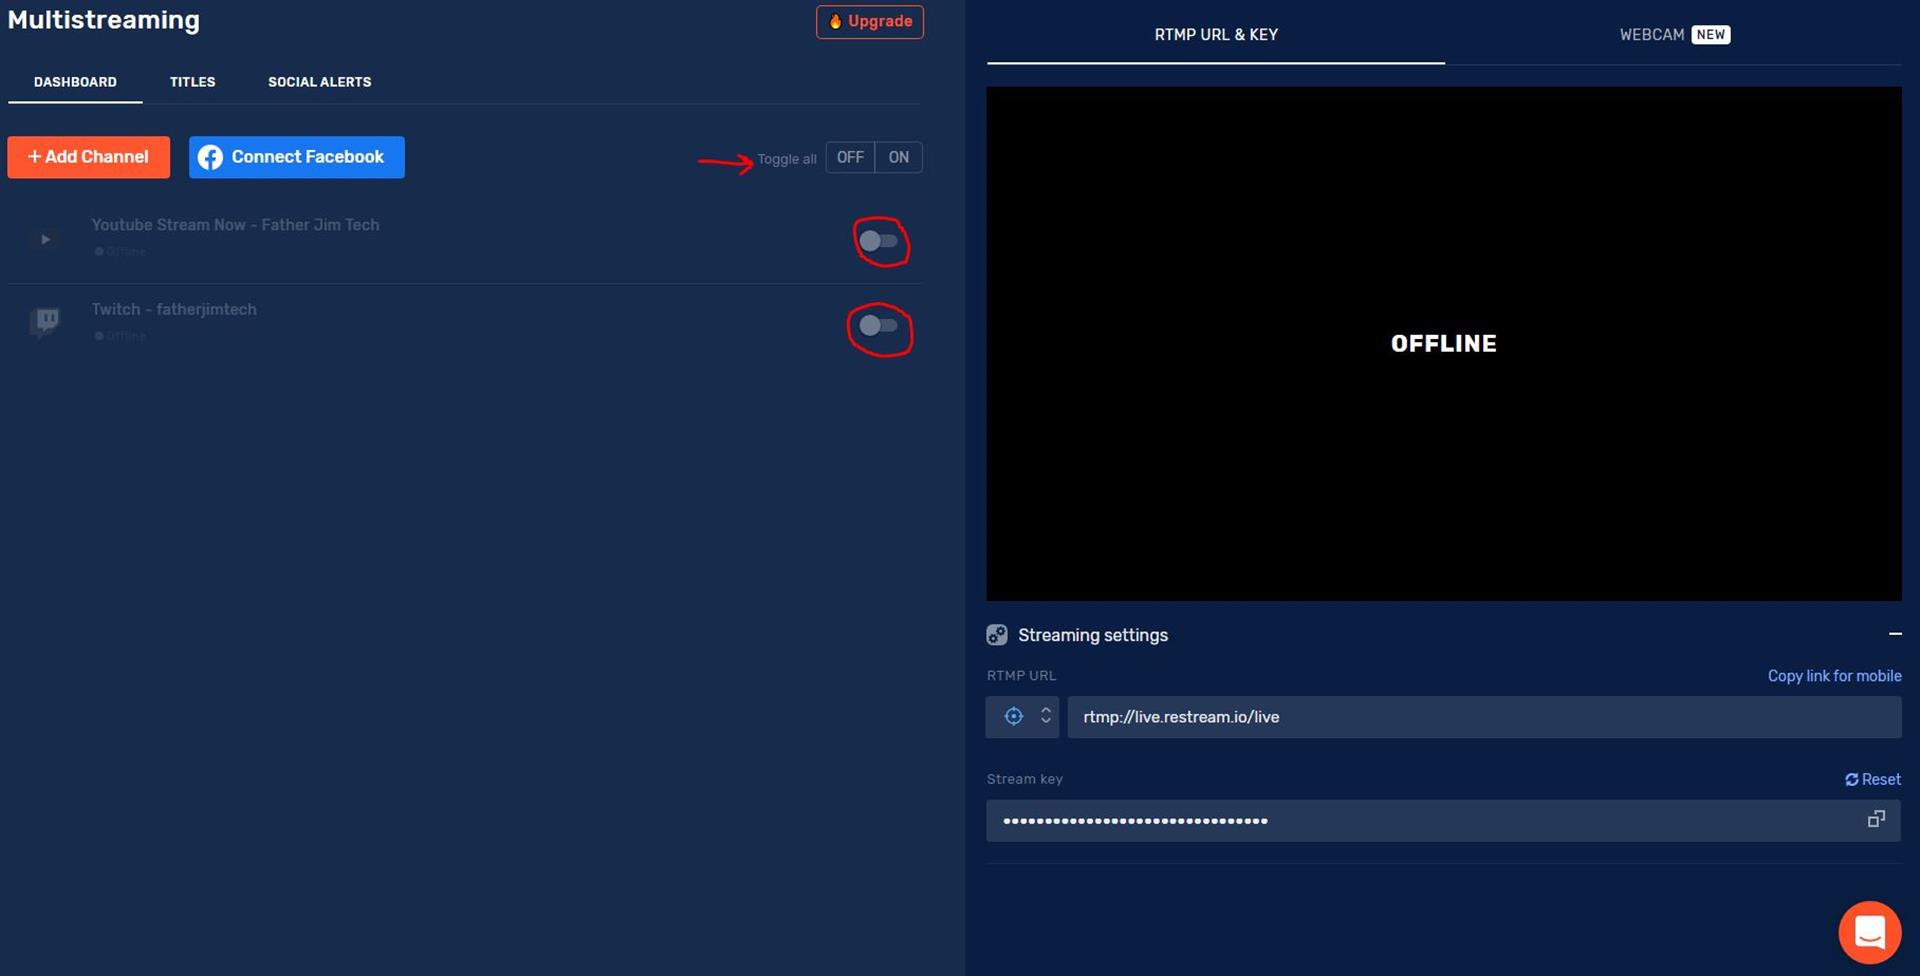
Before testing the stream, go to the Restream Dashboard and flip the switches next to each platform to the off position. This will prevent our test stream from going out to YouTube or Twitch. We will turn them back on when it’s time to go live.
To begin broadcasting from our mobile device, tap the red record button on the Streamlabs main window.
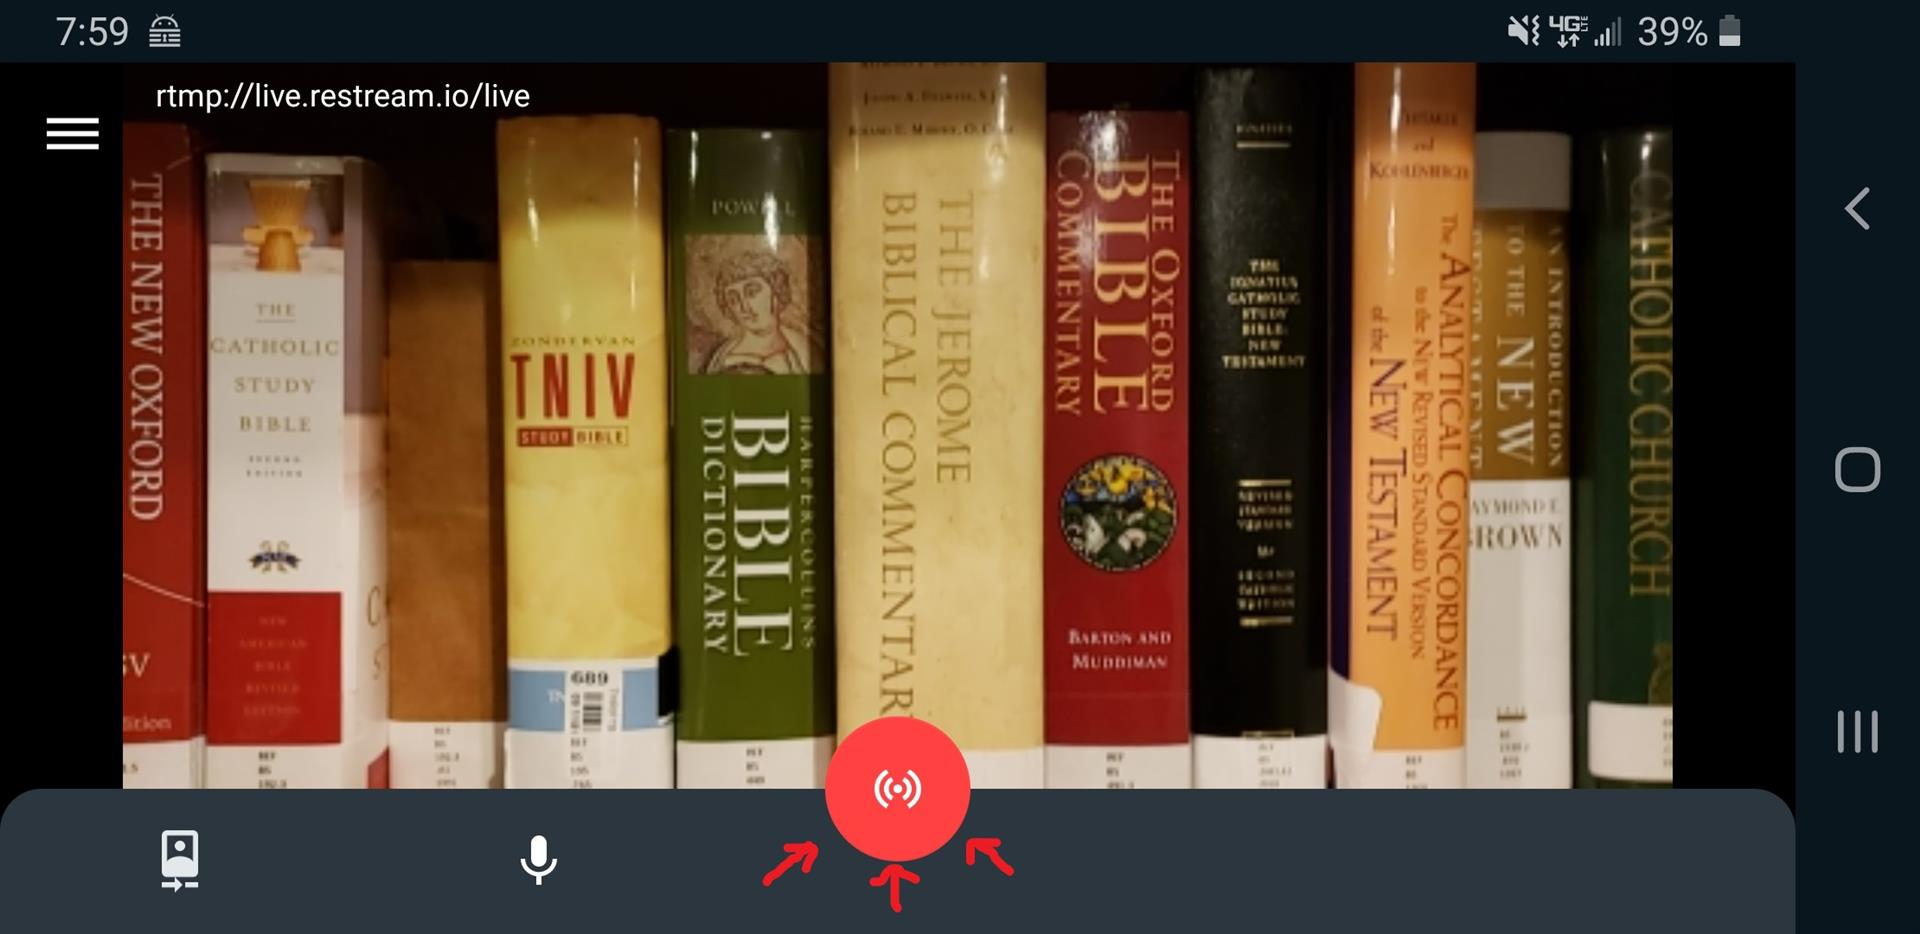
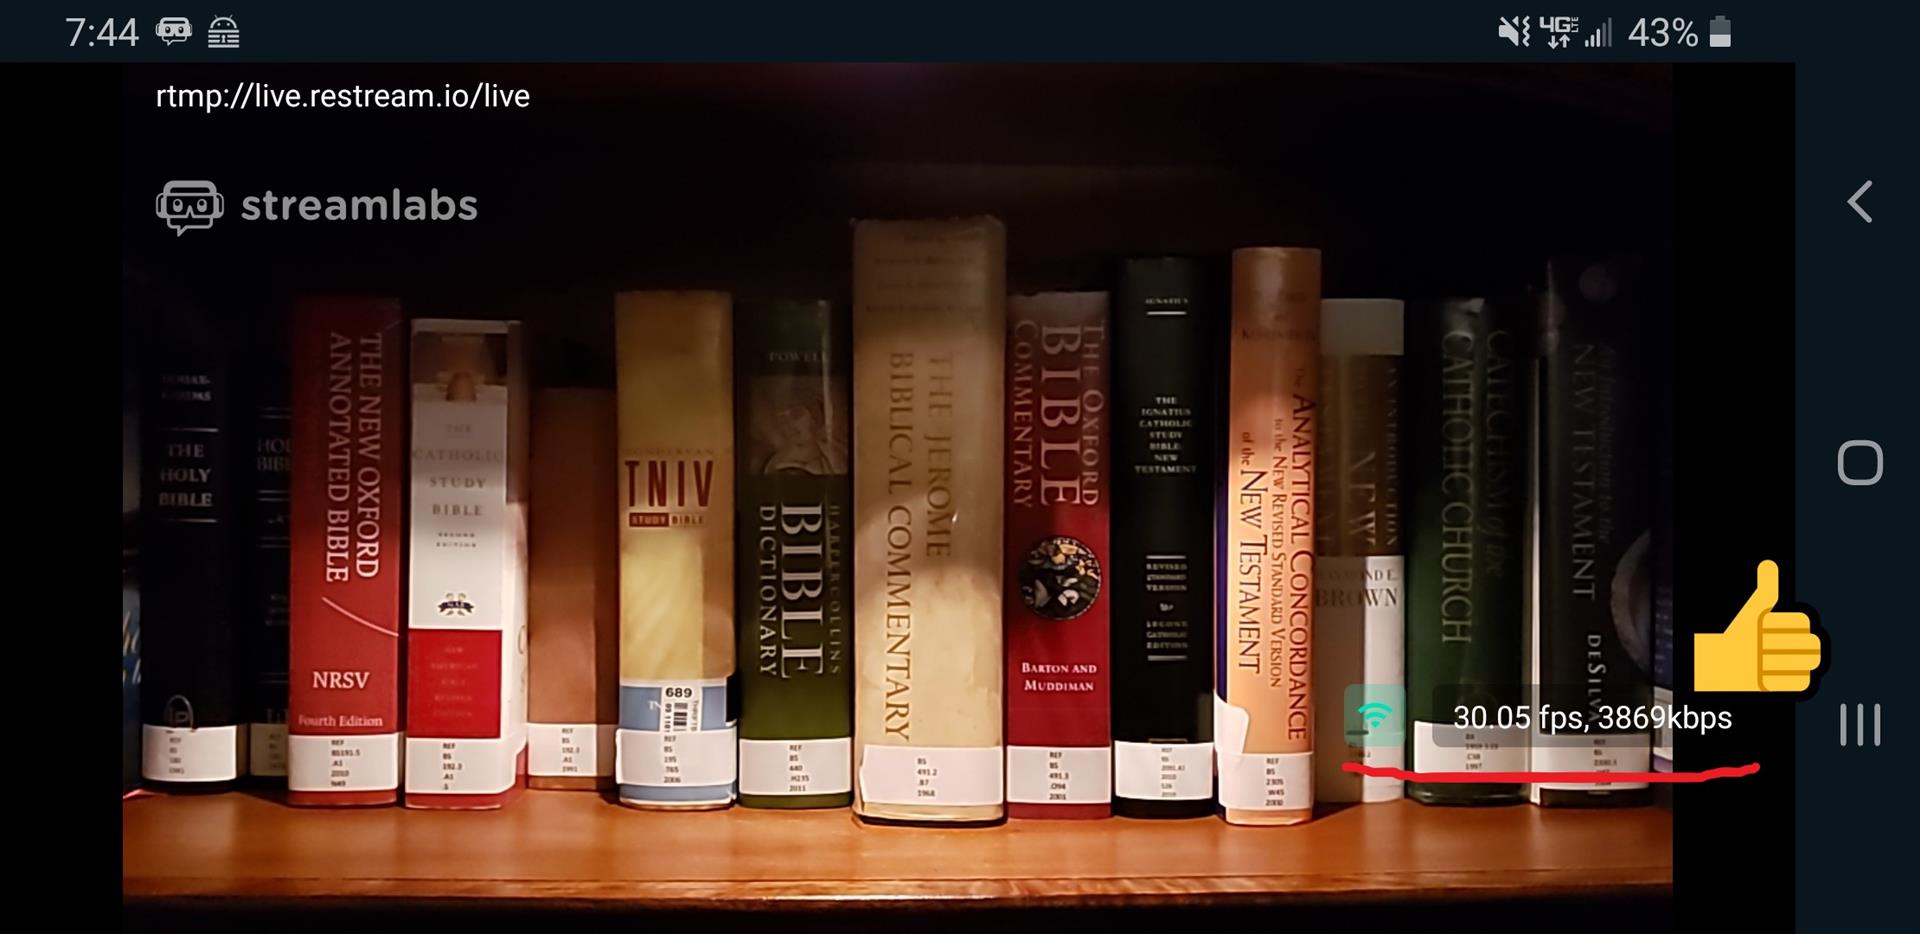
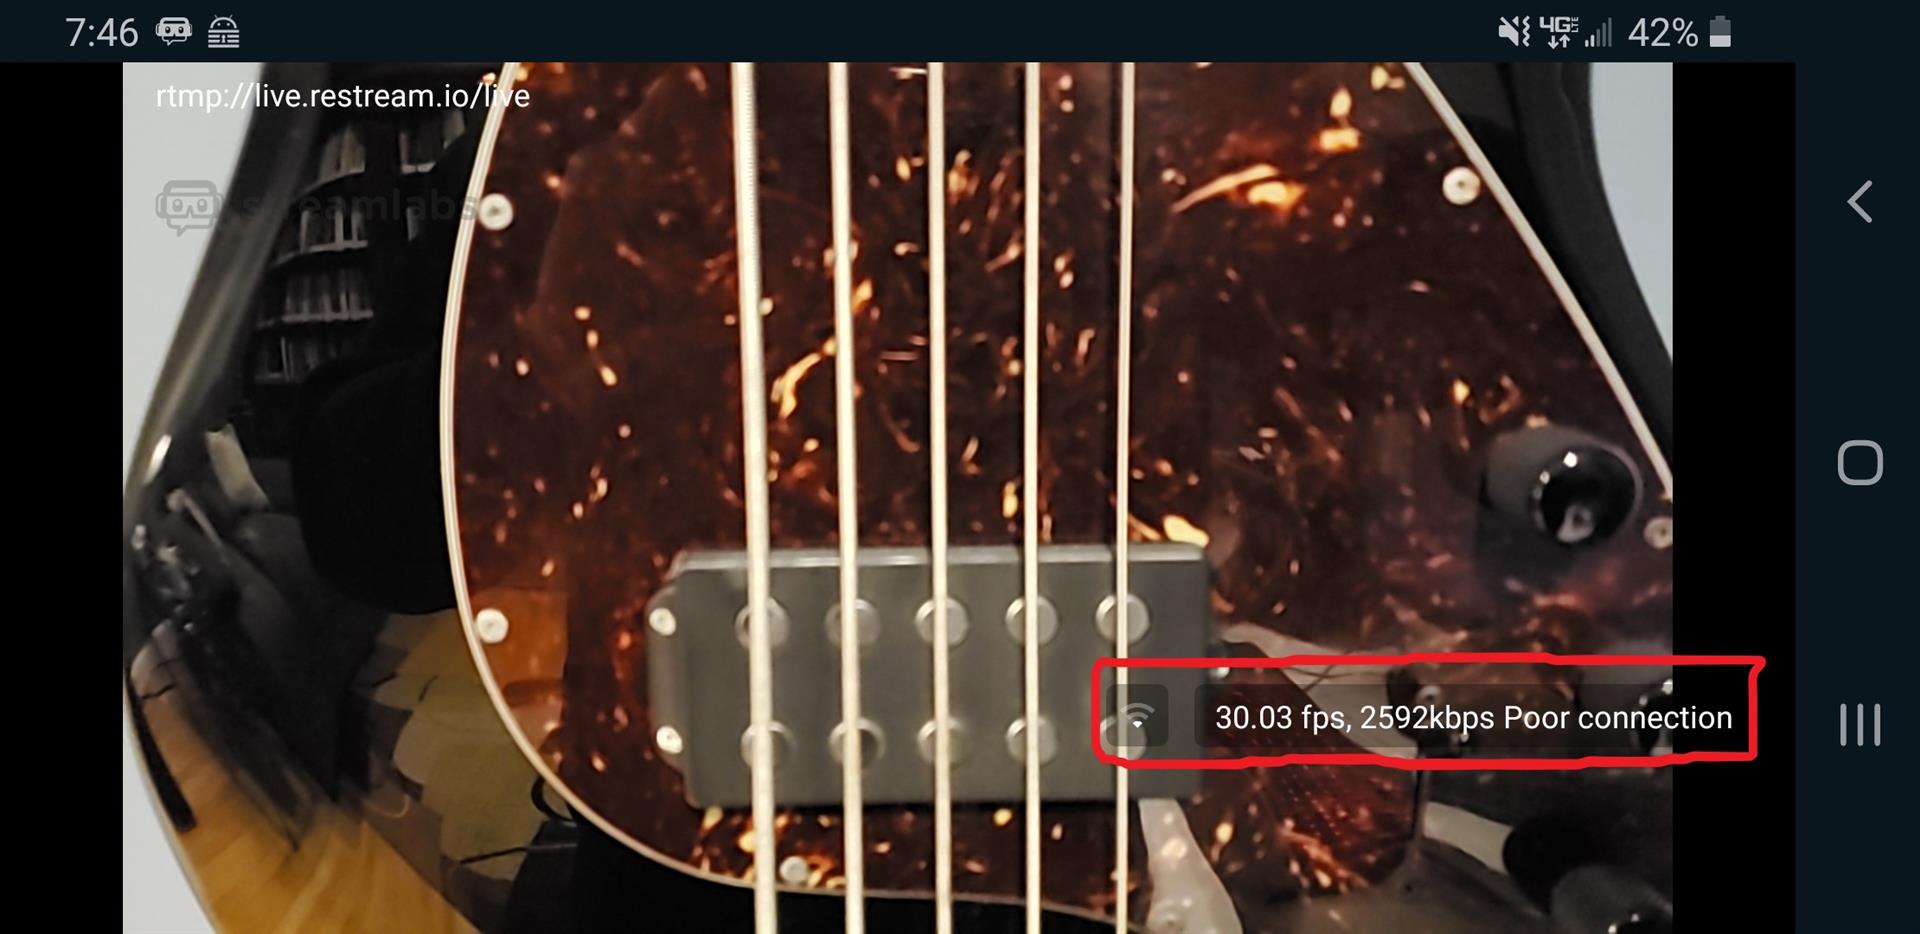
Take note of the stream connection health in the bottom right of the screen (this will not appear on the broadcast). This should be as close to full bars as possible. Also, take note of the average frames per second and bitrate. You’ll want to ensure your device is streaming at a minimum of 24 fps, 3000kbps.
For poor connection speeds, please see the additional considerations below for tips on how to improve your connection.
Step 6 - Our First Stream
Now that the stream has been tested and working. It’s time to title our stream. From the Restream Dashboard, click the title tab, enter a title, and click Update All. This will change the title of our live stream on each of the platforms below.
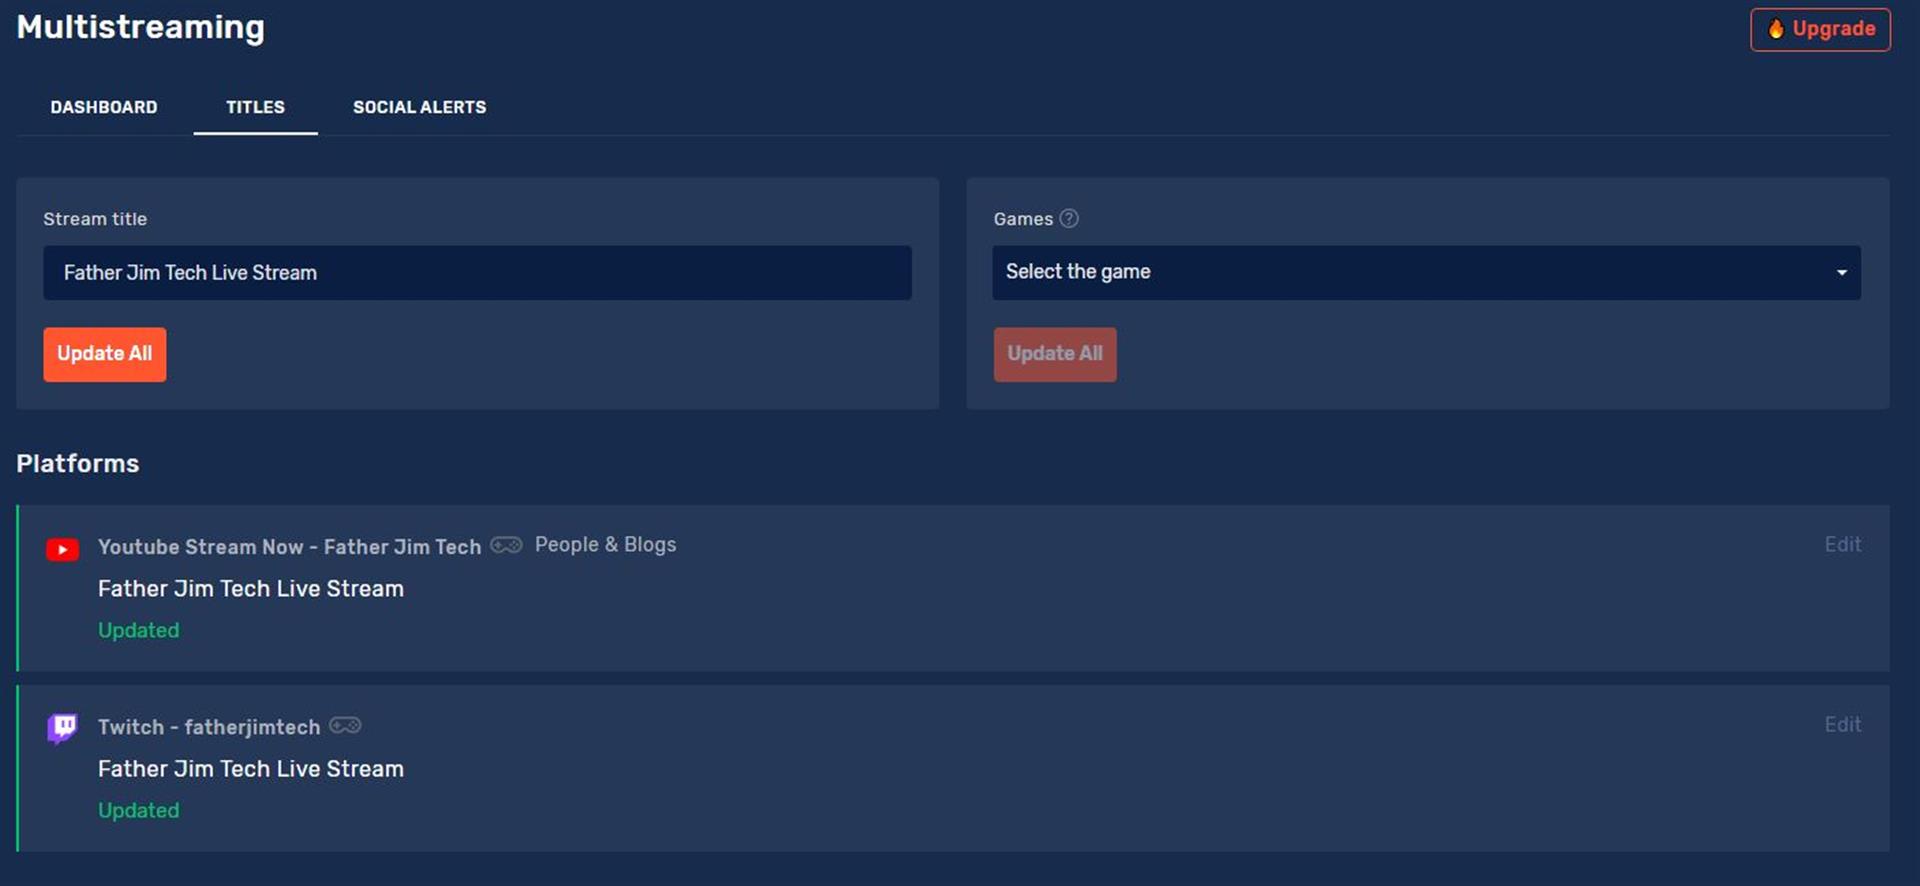
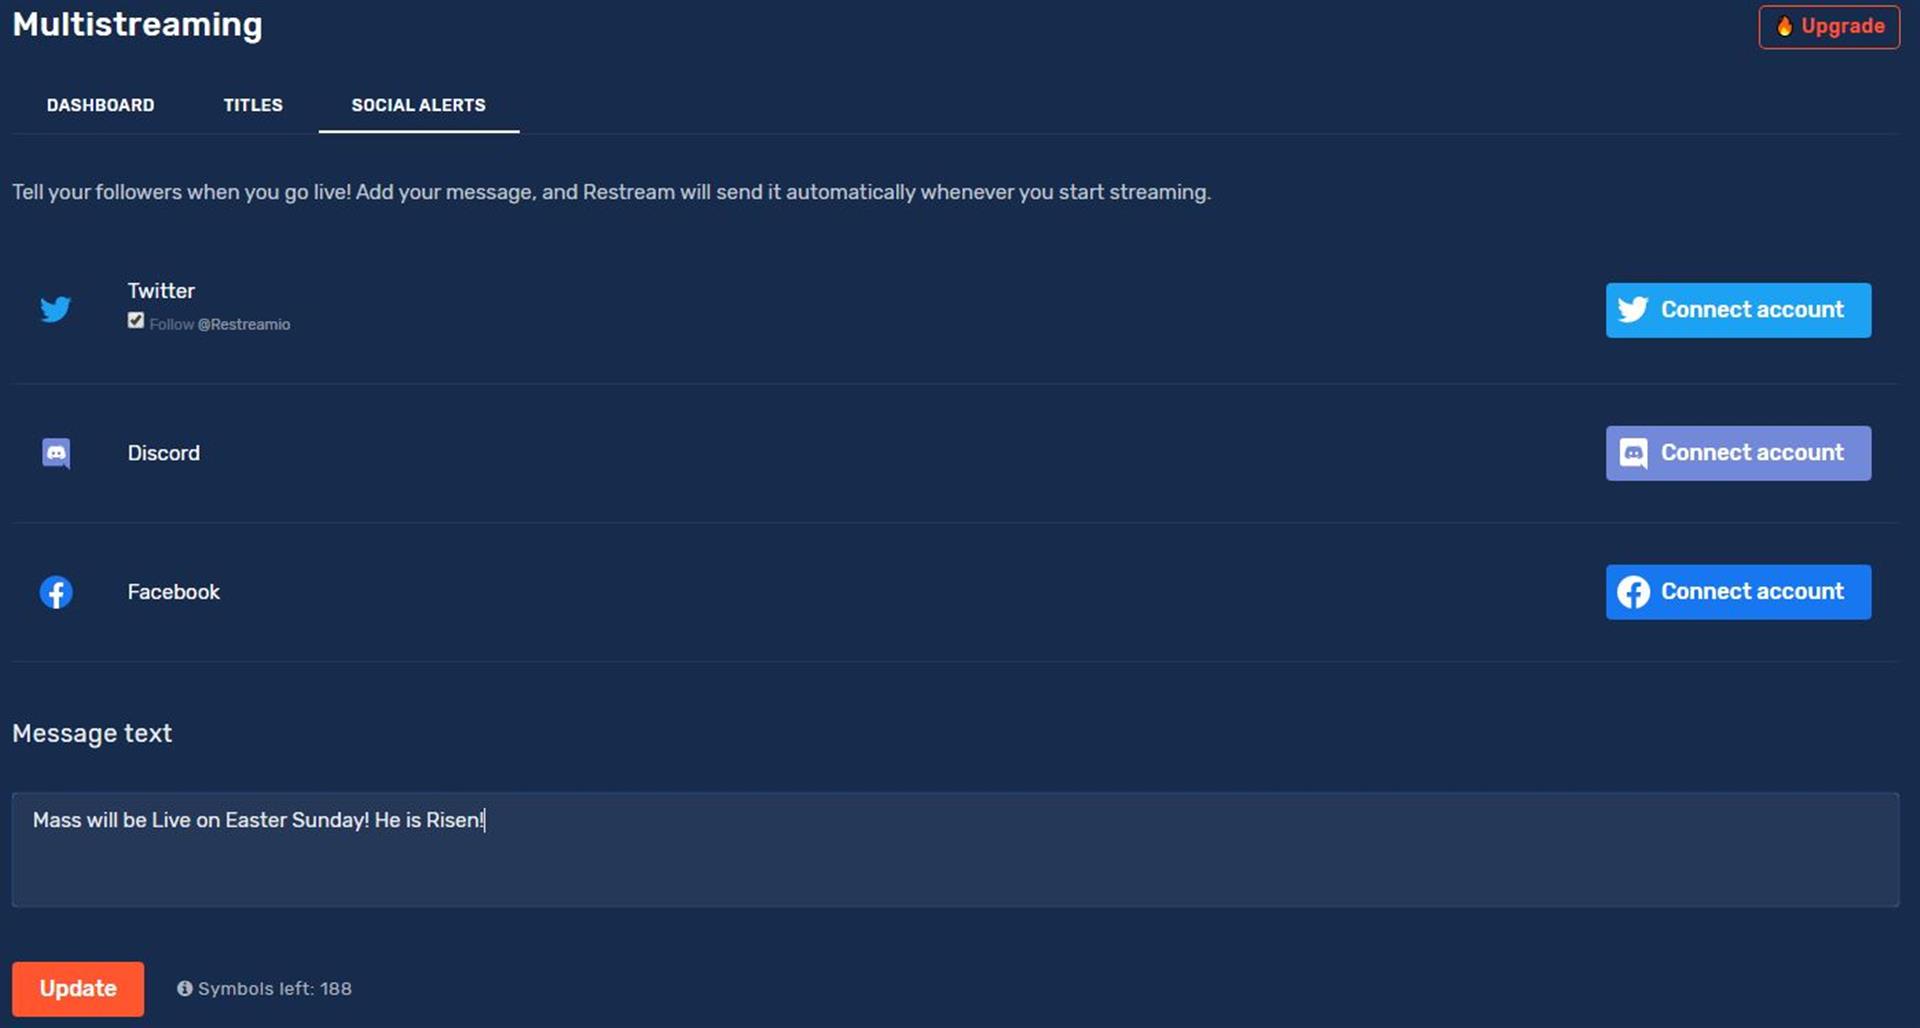
From the social tab we can send a message to all social media accounts connected to Restream.
Finally, on the Dashboard tab, be sure to toggle all channels back on. Otherwise, the stream will not be broadcast to those platforms.

We did it! Highfive! Now, whenever we tap record on our Streamlabs app we will be live on YouTube and Twitch.

Additional Considerations
Power
When recording anything live, especially with a mobile device, it is always best to have the device connected to its charger and pluged into the wall. The camera, Wi-Fi antenna, and screen working simultaneously will quickly drain the battery. Be sure to properly power the device so as to avoid unwanted interruption due to battery drain.
WiFi Connection
I recommend putting mobile devices in Airplane mode, then manually enabling Wi-Fi. Most mobile networks have been known to throttle mobile data connections. This can greatly affect the quality of the stream. Wi-Fi will provide a much more reliable and stable connection without the bandwidth constrictions of mobile data. With mobile data disabled, Streamlabs will automatically use the Wi-Fi connection.
Lighting
When it comes to capturing a clear image, lighting is everything. Perhaps that’s why the first words God speaks in the Bible are, “Let there be light.” And lo, lots of light for any camera is good.
Whenever possible, try to avoid low-light correction from a mobile device. While this may look okay on the mobile device, but it will be different on a computer screen or television. Often, the picture quality will appear grainy and washed out on larger screens.
Sound
There is no substitute for good sound. When God said, “Let there be light,” the light heard and responded with its brightness and splendor. Many of the microphones on mobile devices are decent, but far from perfect. So, be sure to speak loudly and clearly when relying on the built-in microphone.
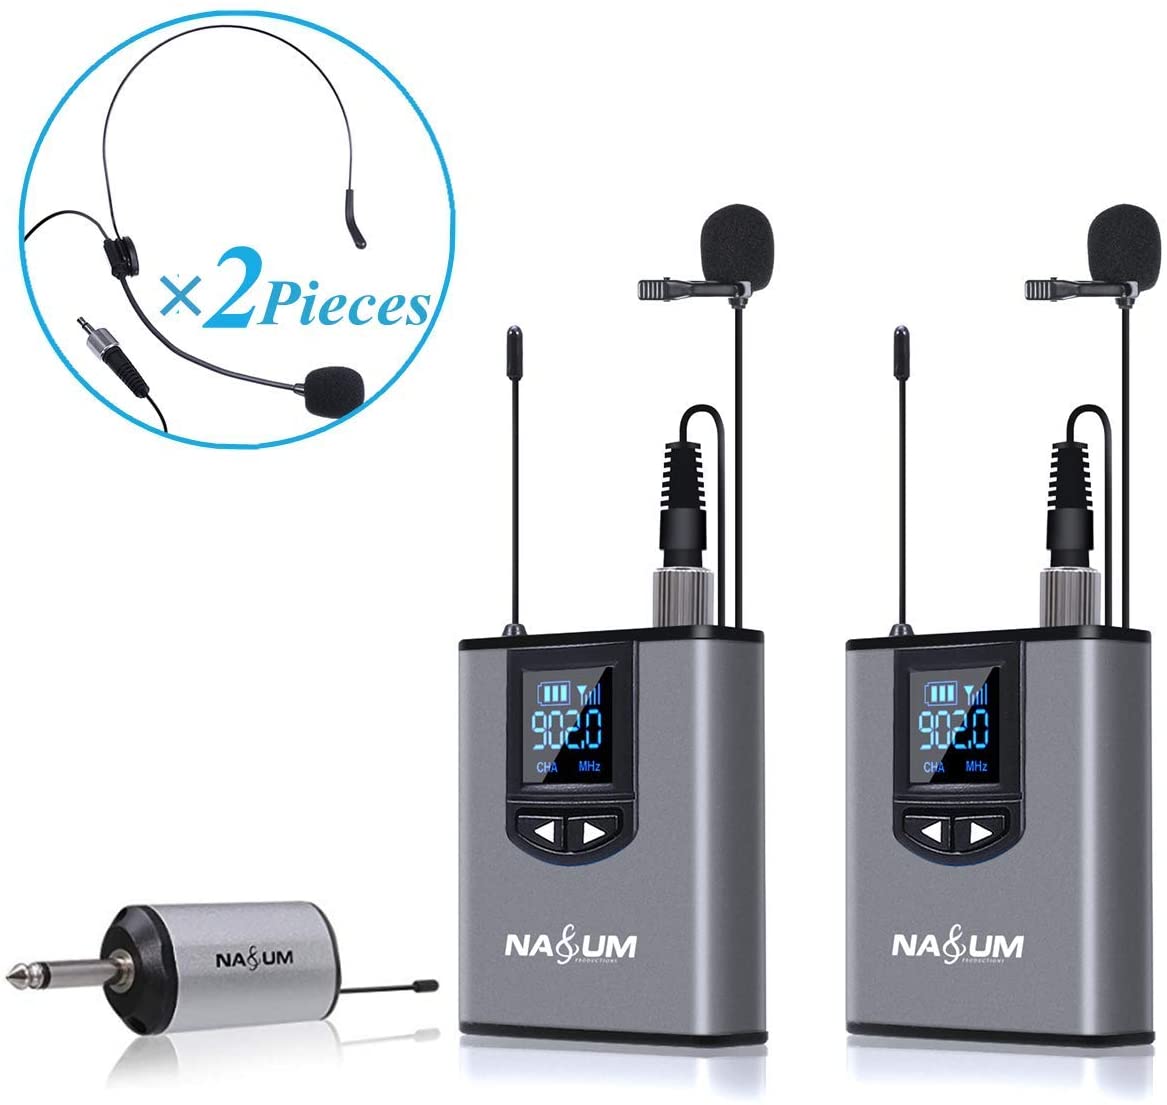
For better results, an inexpensive wireless lavalier microphone can often make a world of difference. Click here for an example of a dual wireless setup for mobile devices.
Share this post
Twitter
Facebook
Pinterest
Email